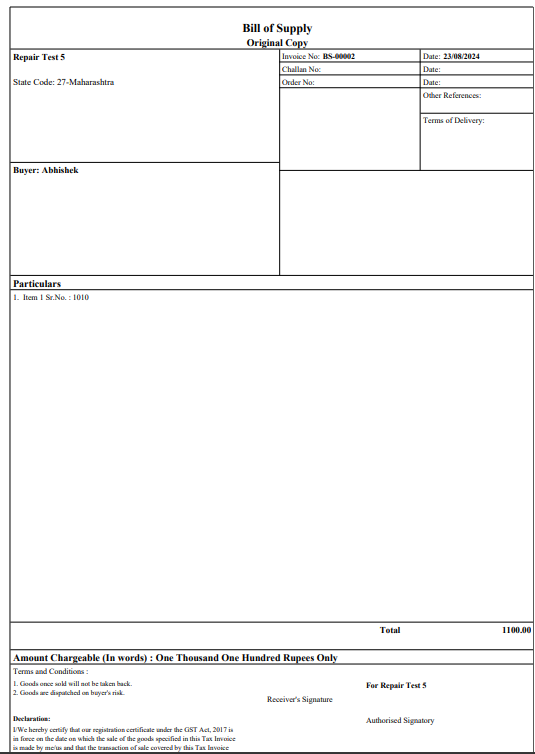
How to Display Only Repair Items in the Sale Print After Clicking ‘Deliver to Customer’ in the Repair Request Report ?
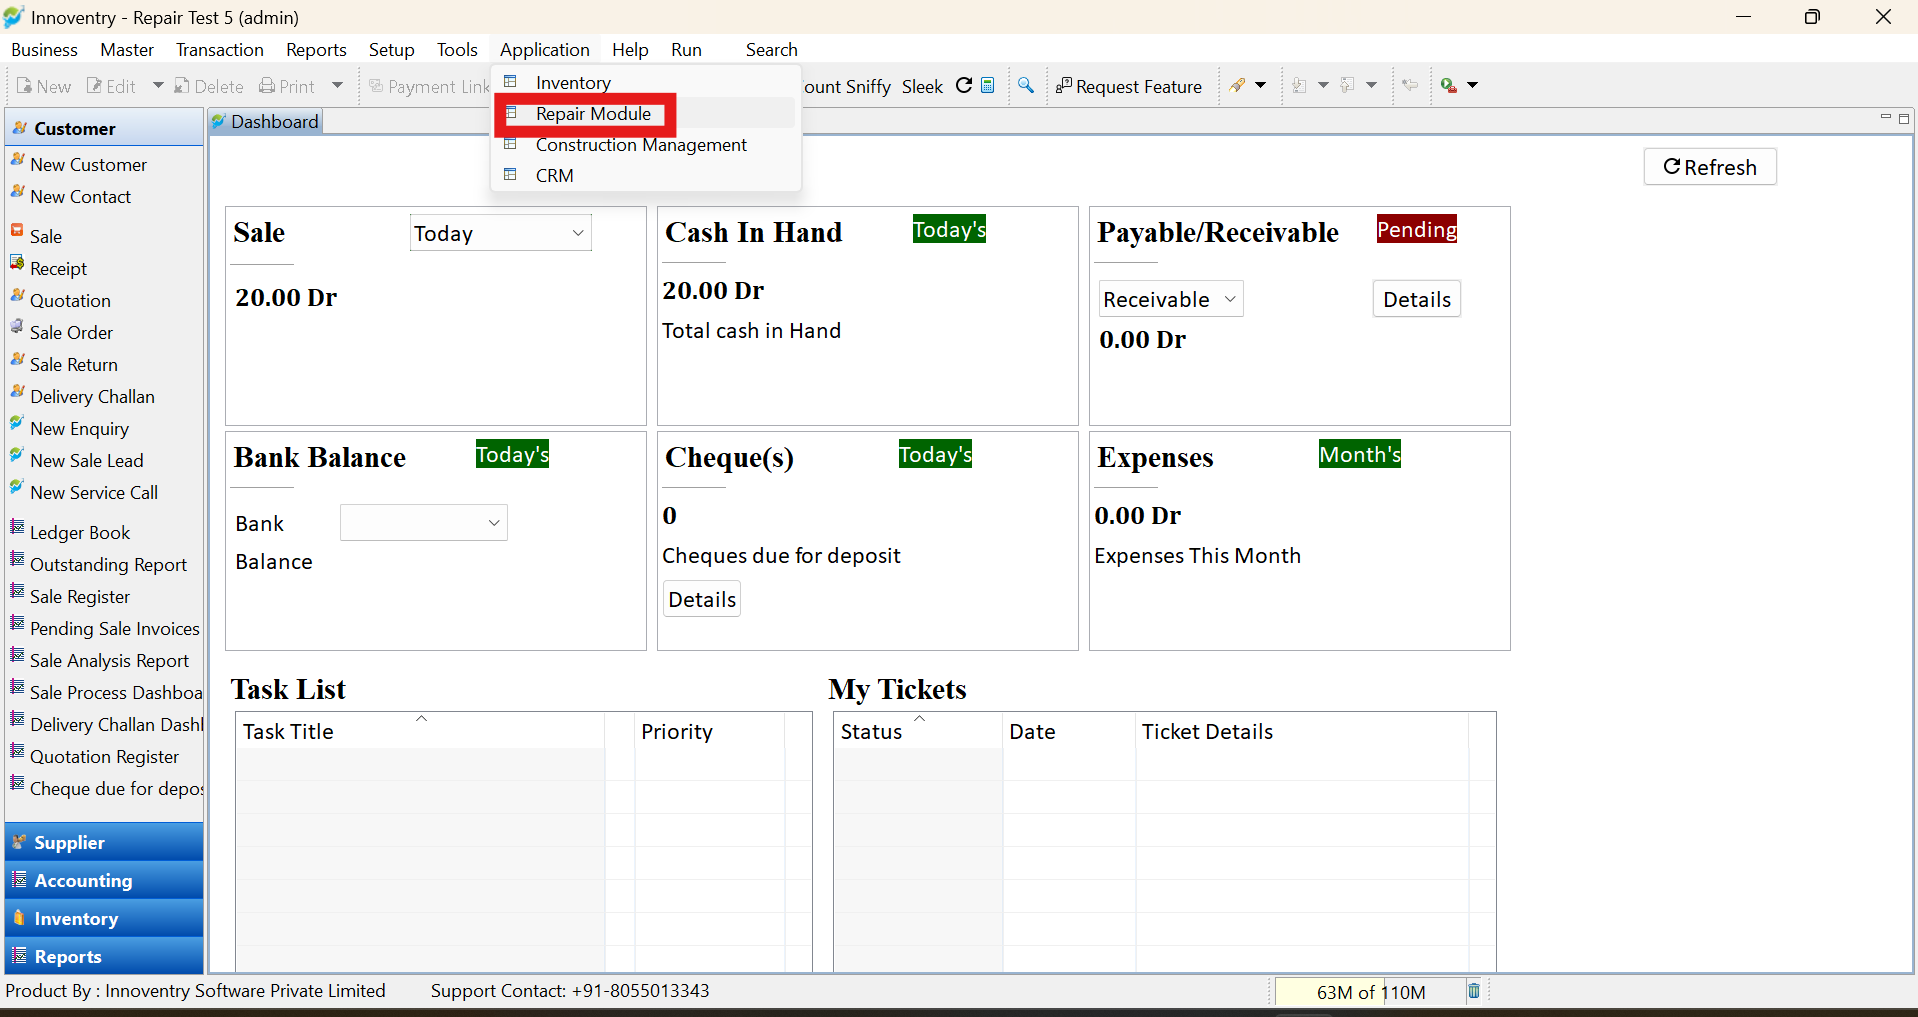
Step 1: Launch the software, then navigate to the “Application” menu and select the “Repair Module.”
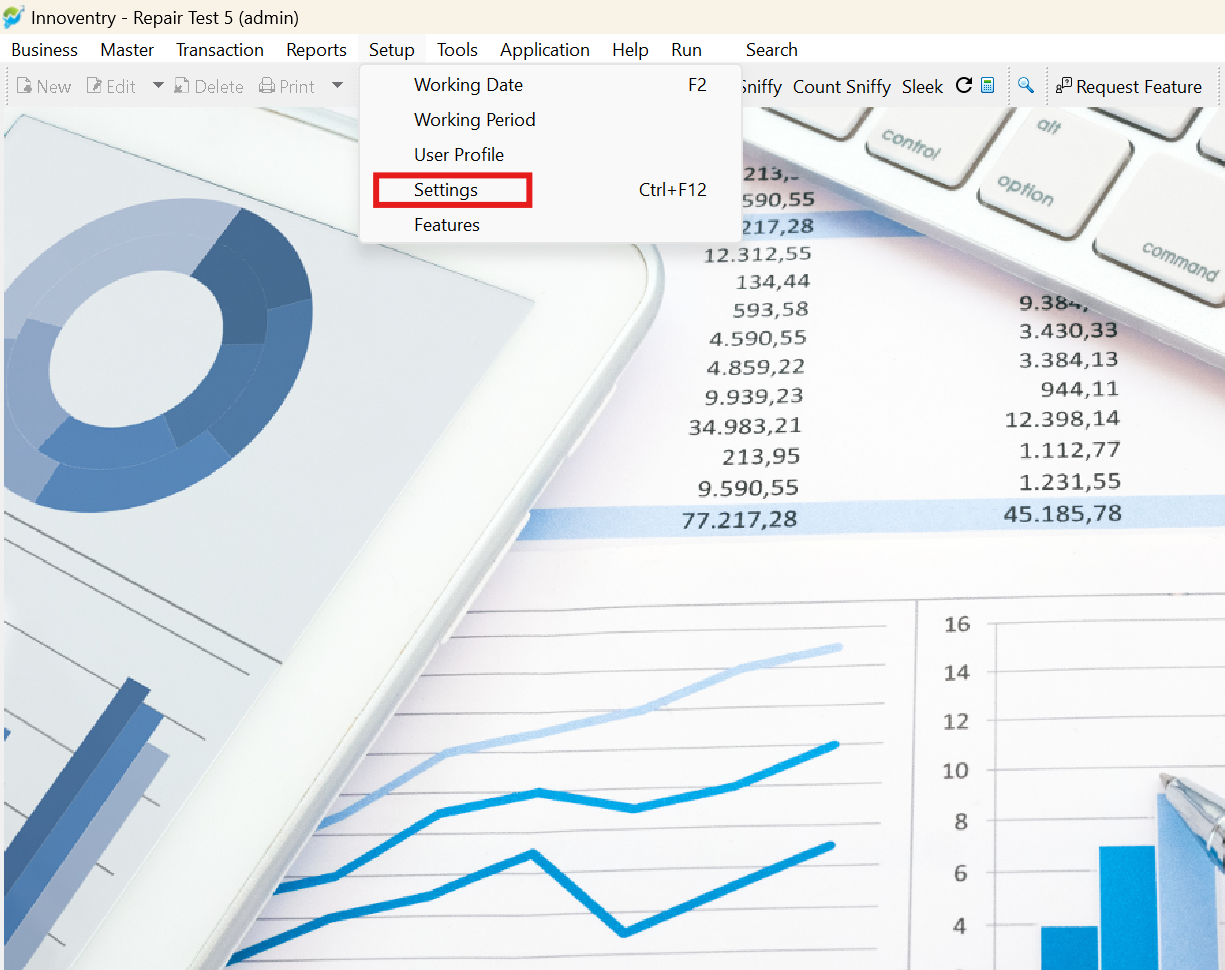
Step 2: Go to “SetUp,” then “Settings.”
Step 3: Scroll down and select “Sale Print Setting.”
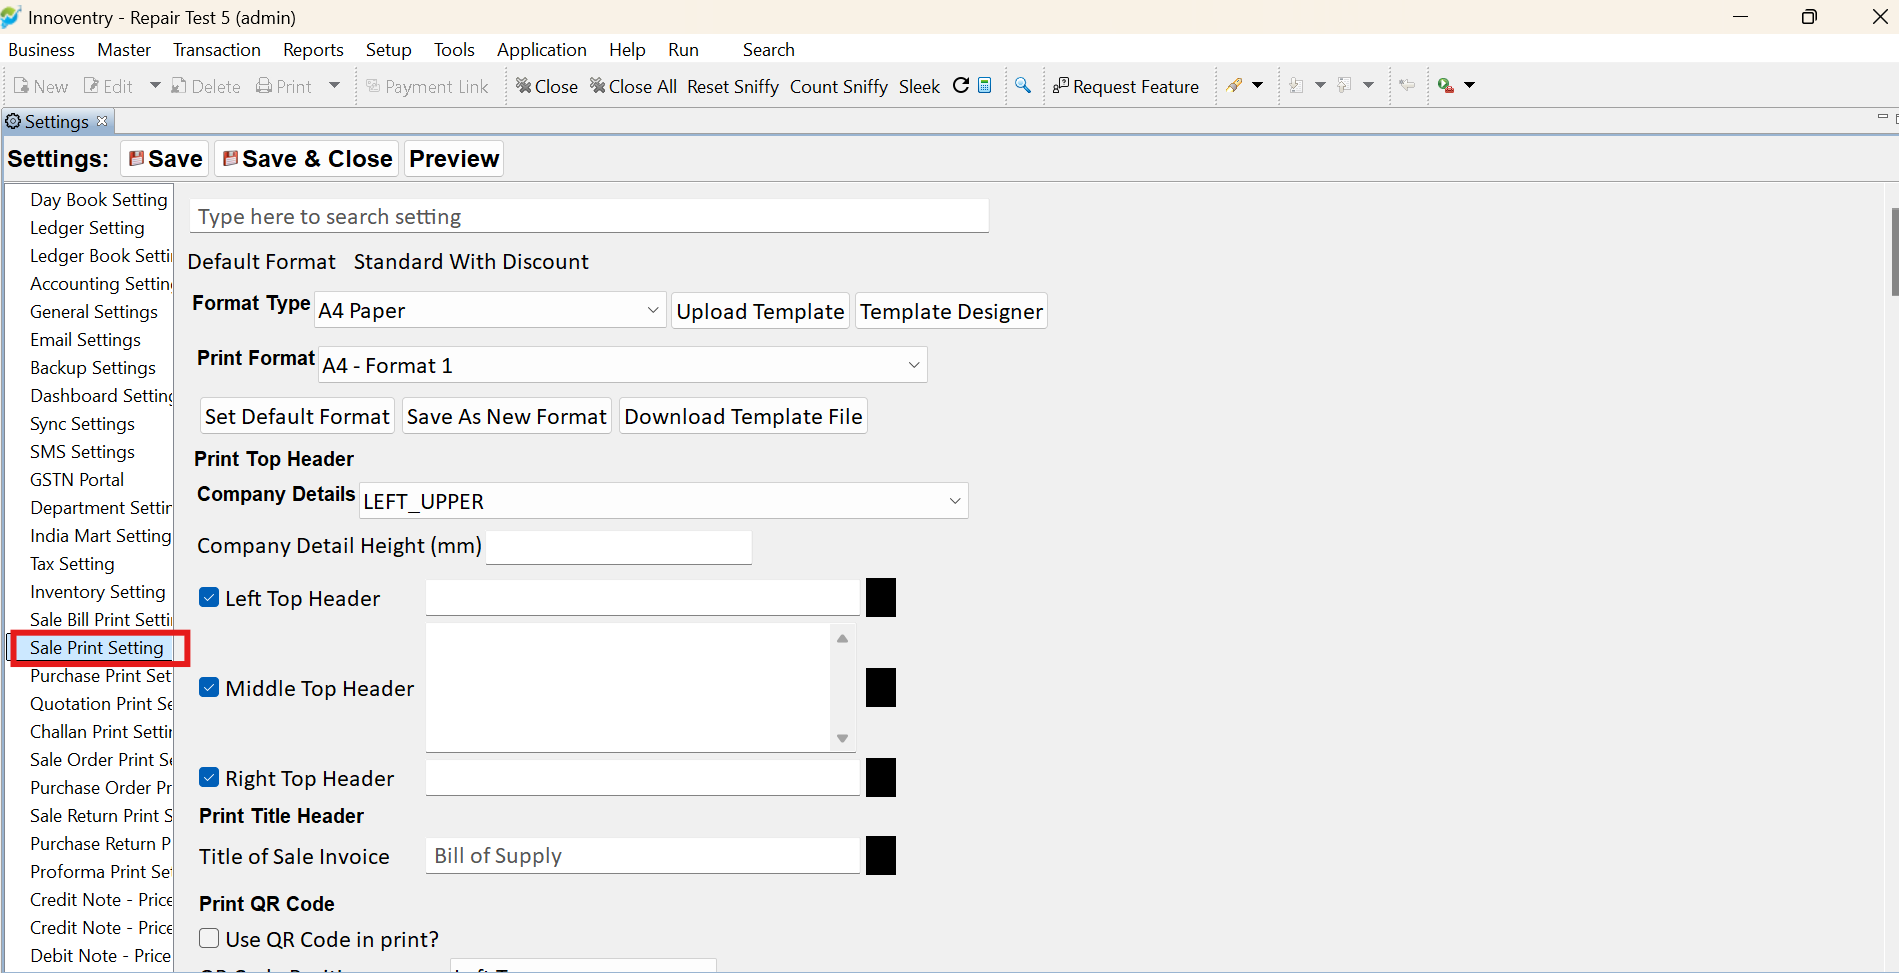
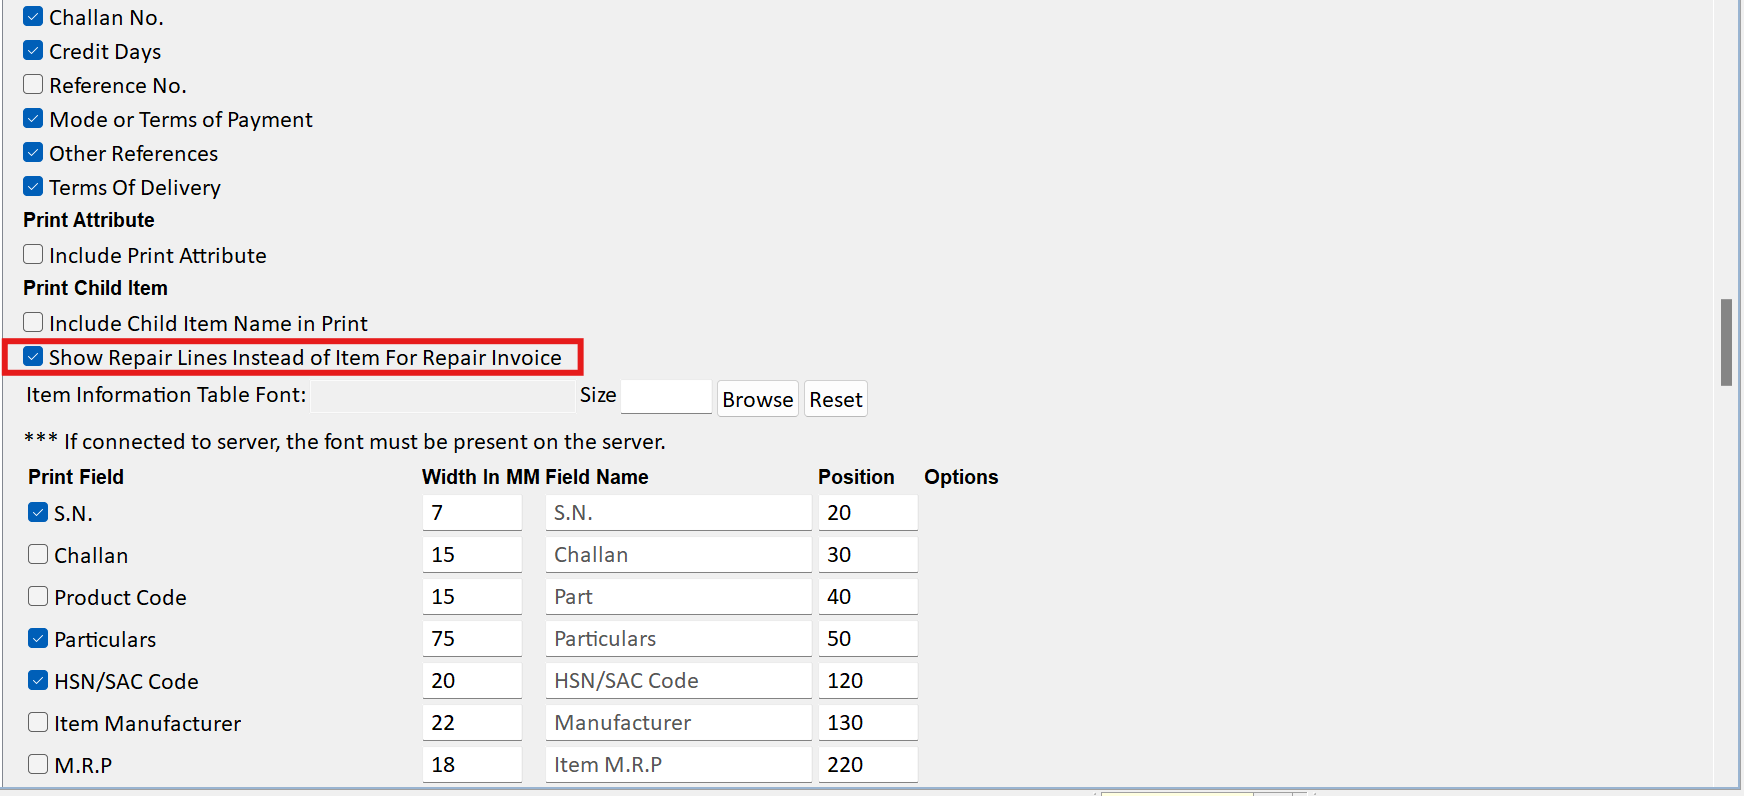
Step 4: Check the appropriate checkbox, then click “Save and Close.”
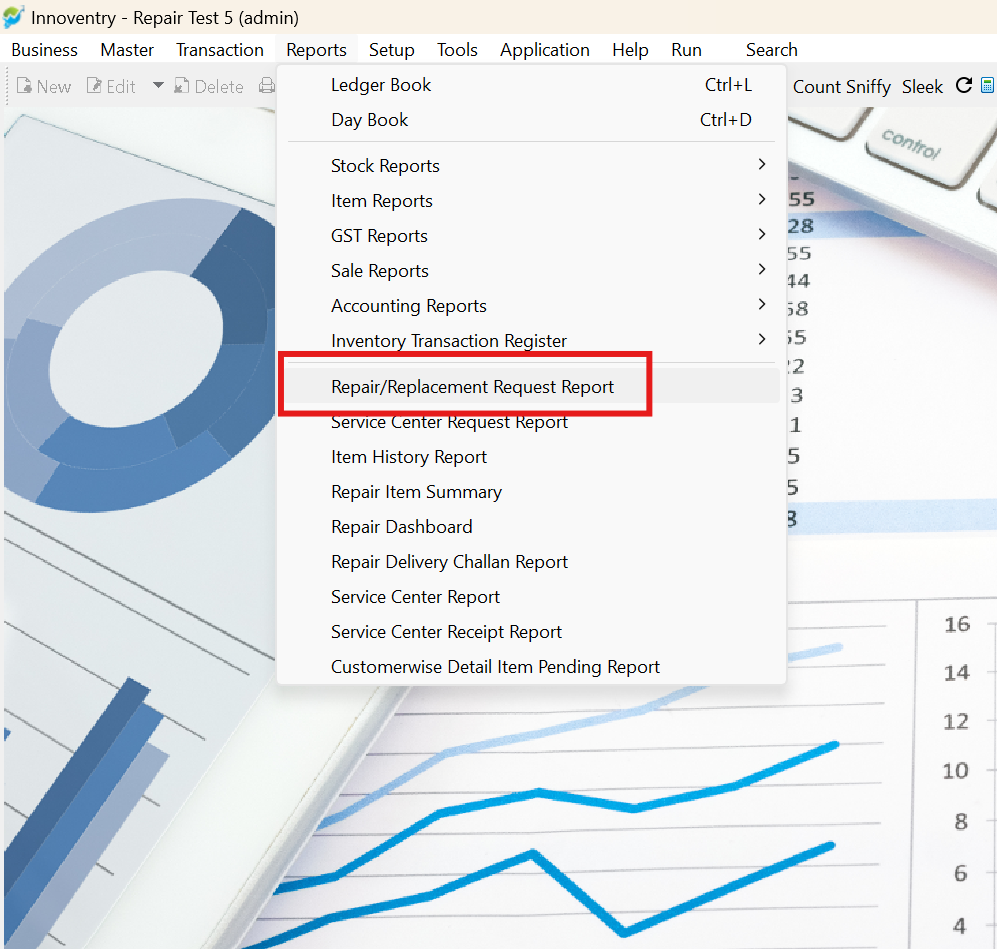
Step 5: Go to “Reports” and select the “Repair Request Report.”
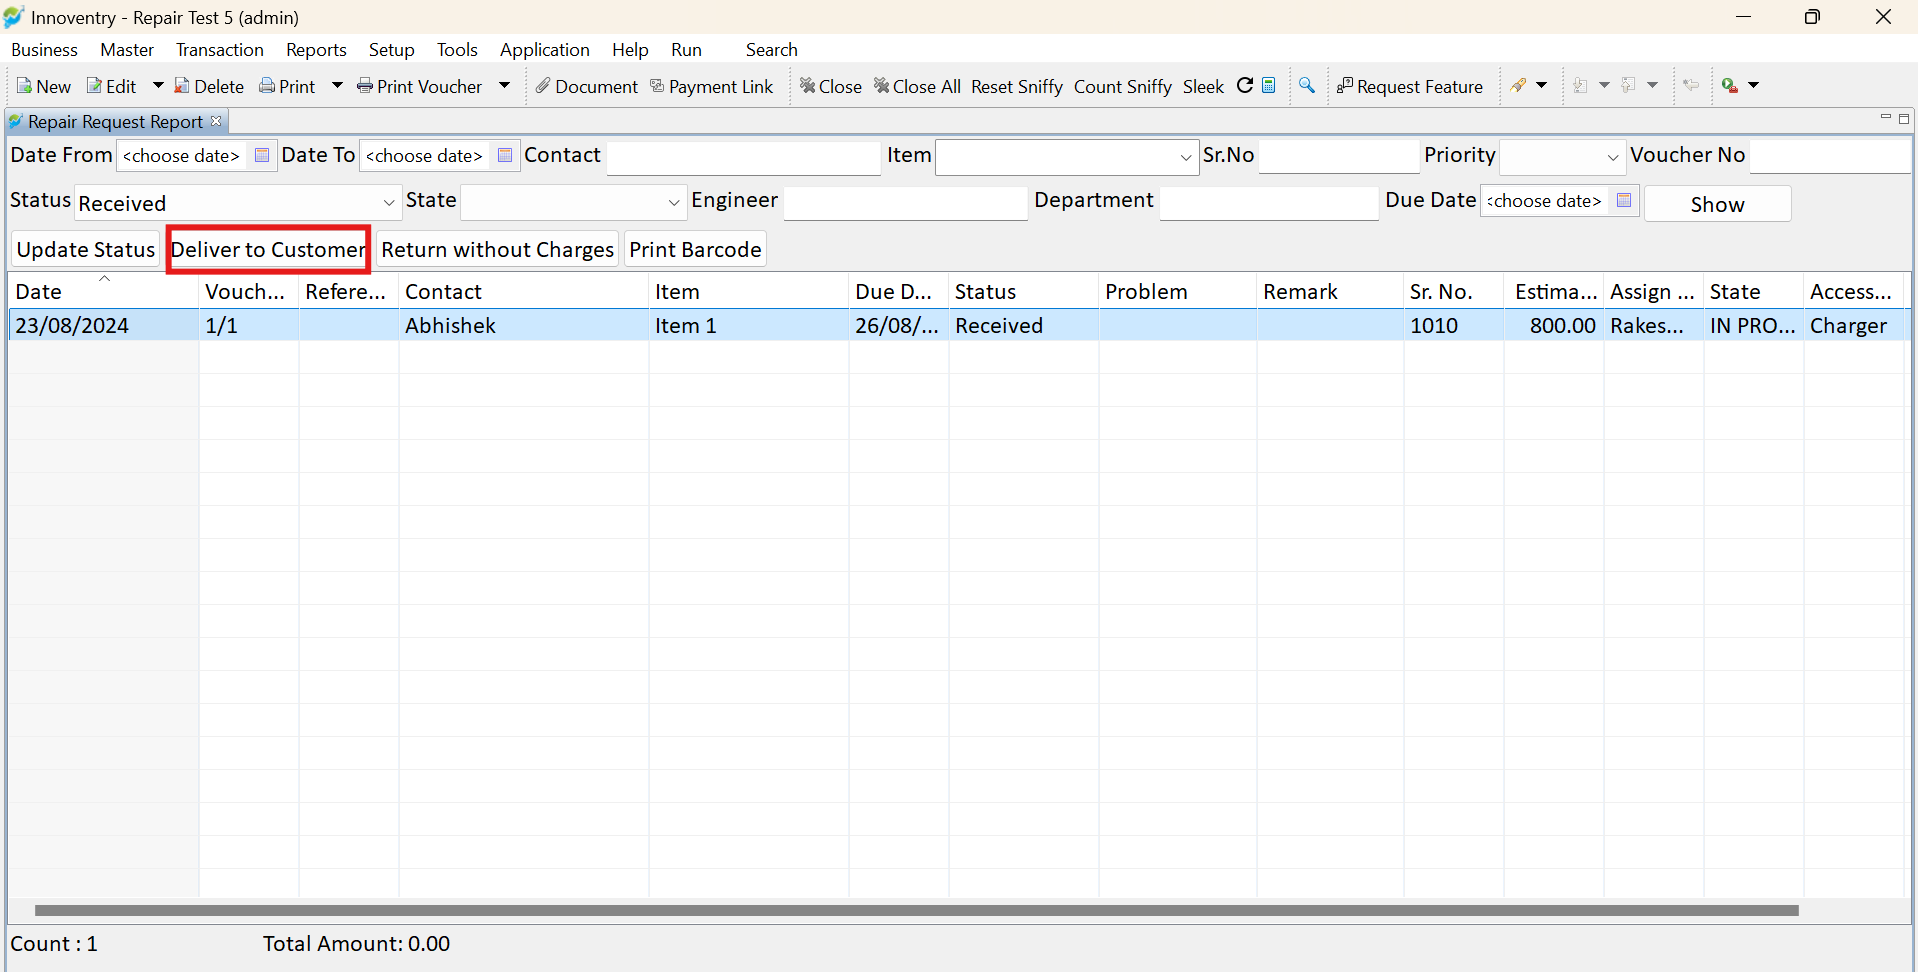
Step 6: Select the entry and click on “Deliver to Customer.”
Step 7: Save the entry, then click on “Print.”
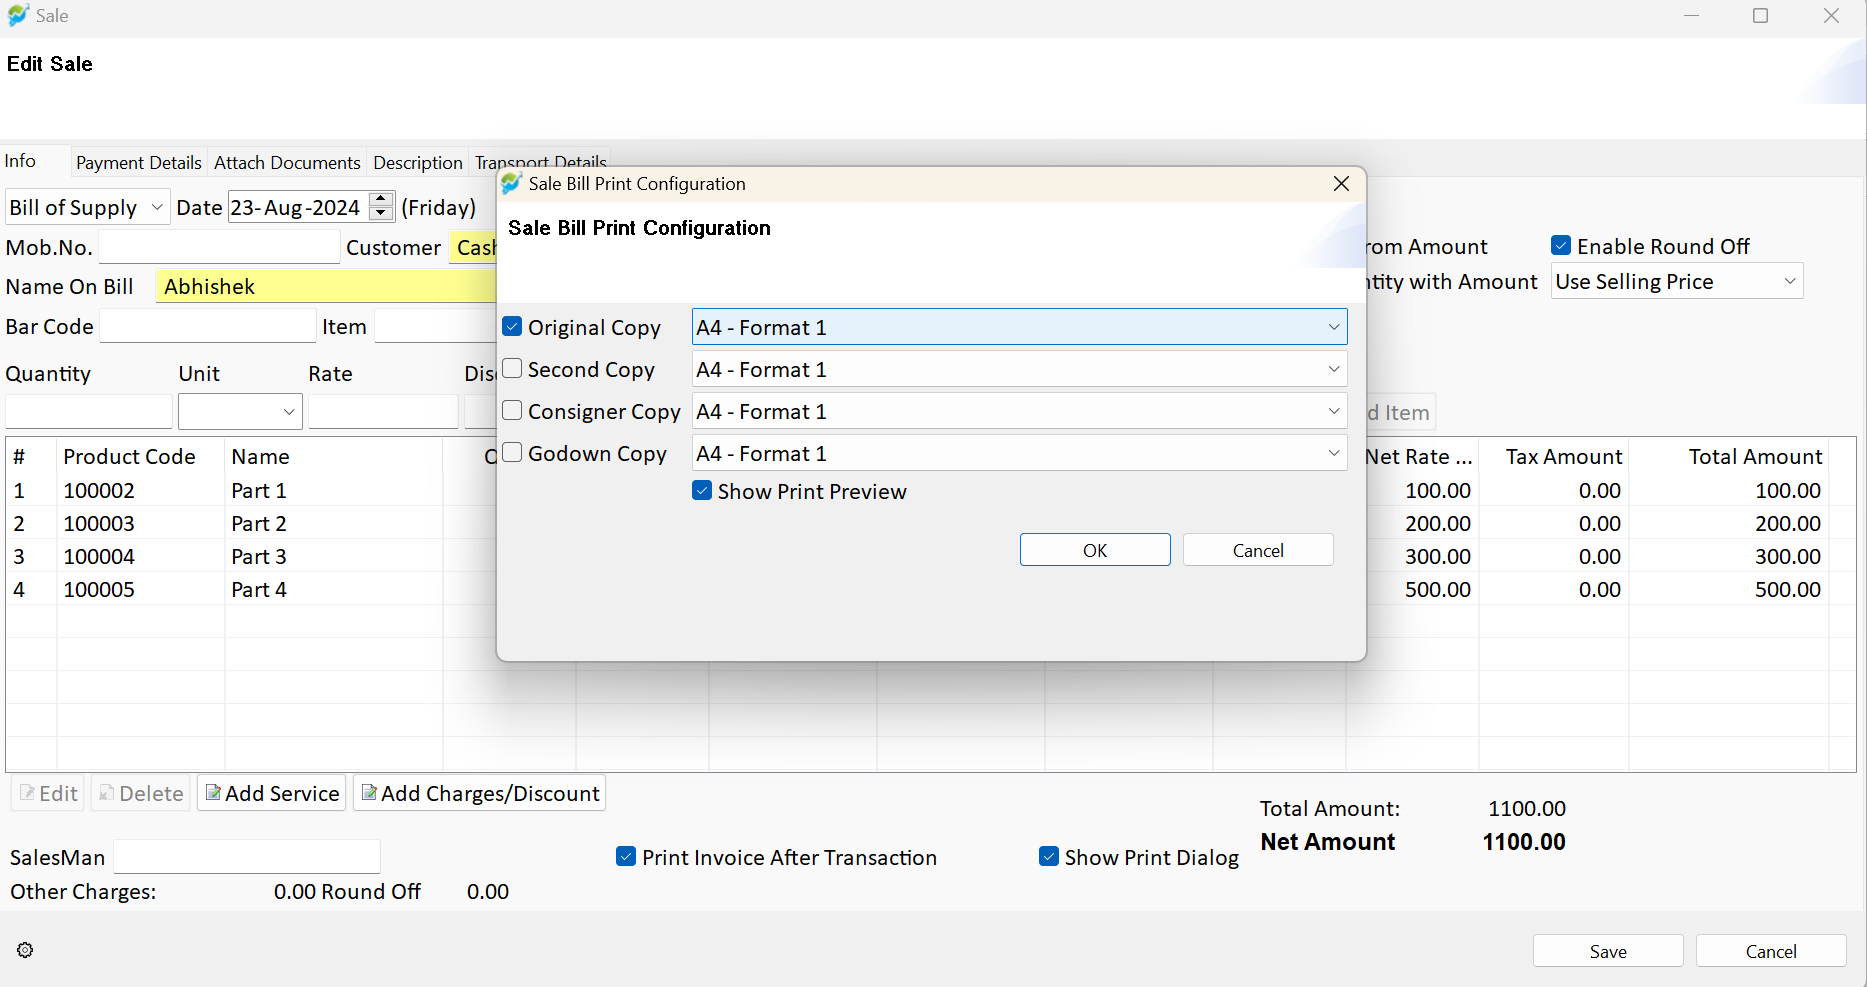
Step 8: In the printout, only the repair item will be shown. The attached part, which was used to update the status, will not be displayed in the print.