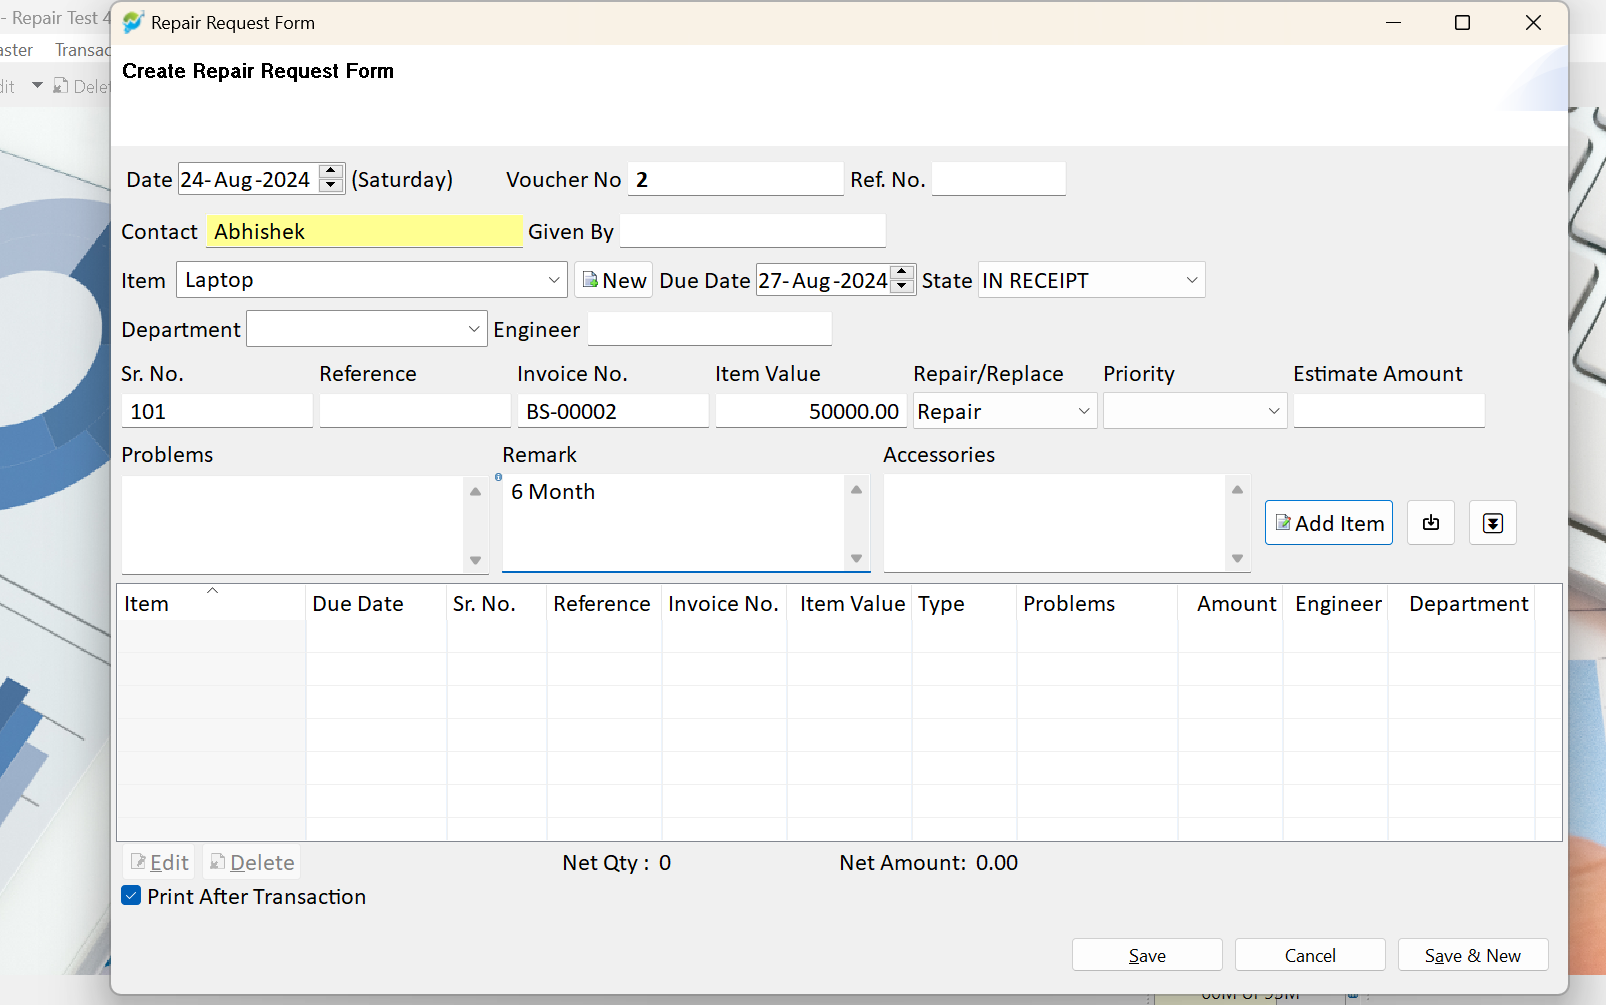
How to Check the Warranty of a Sold Item in the Repair Request Form?
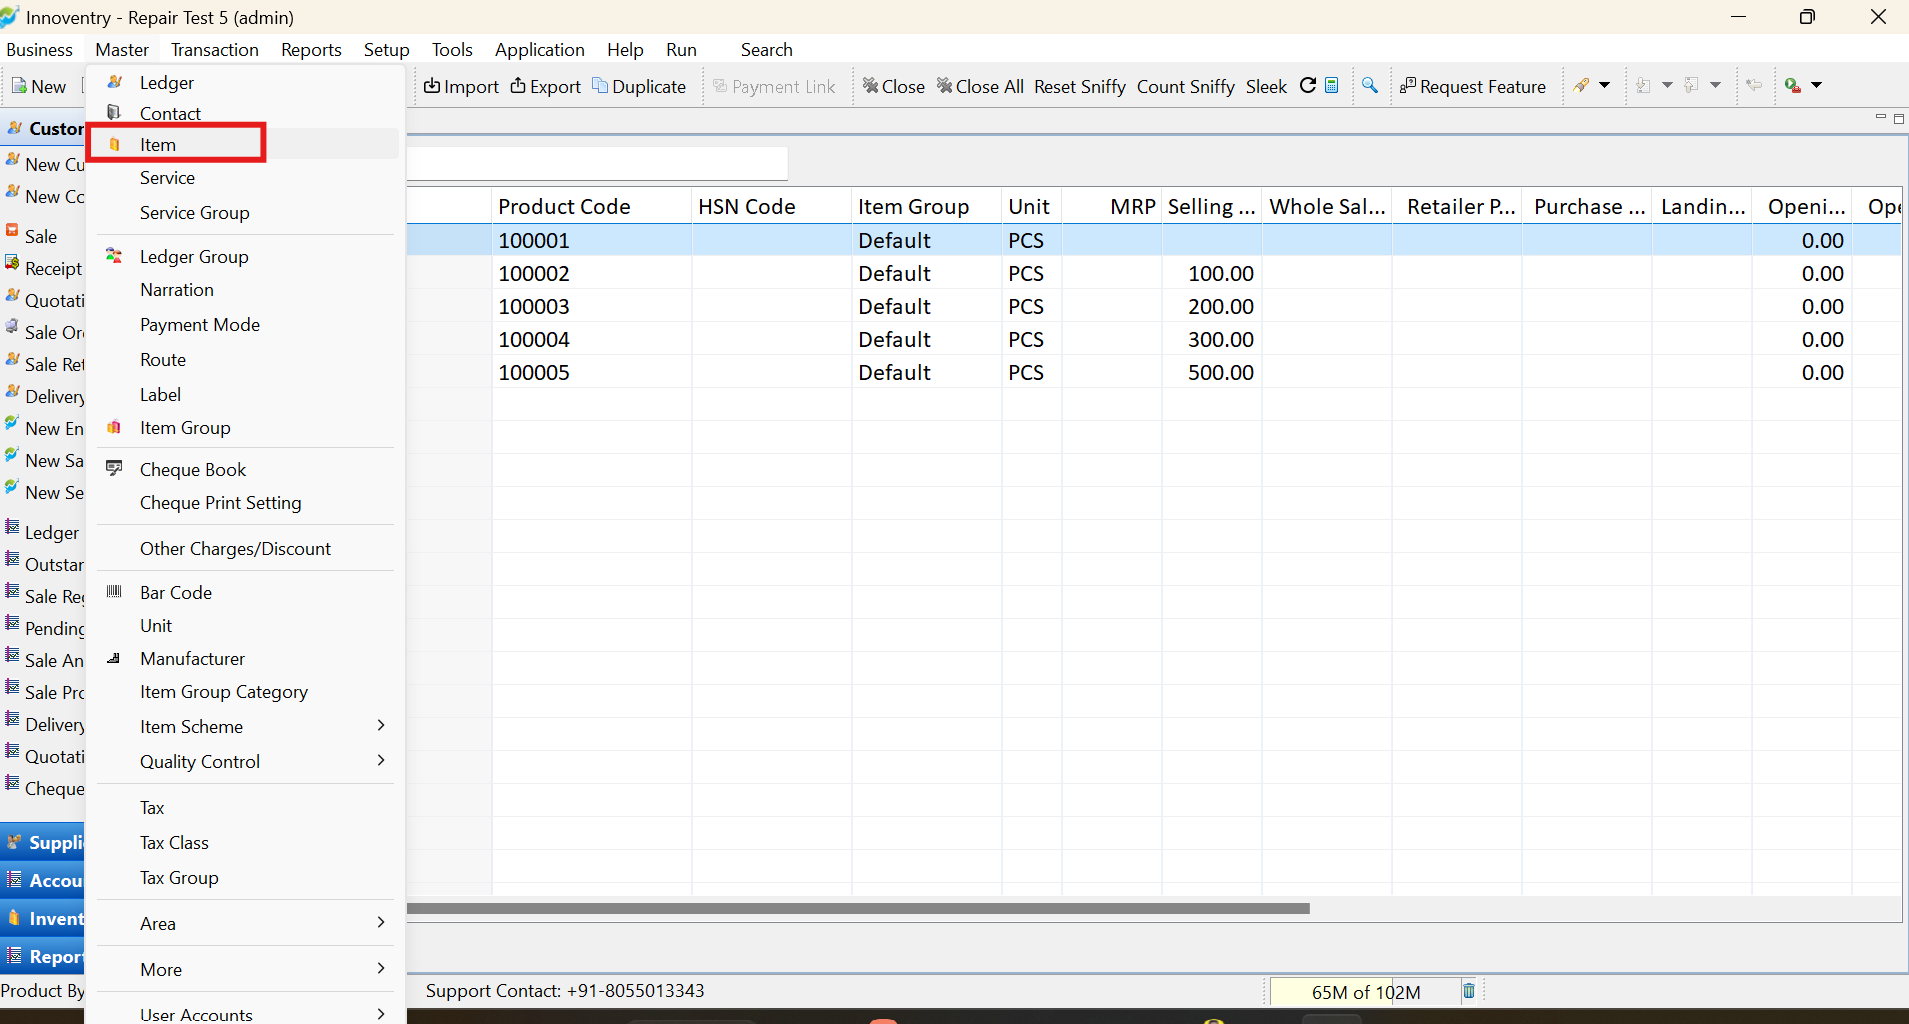
Step 1: Launch the software, navigate to the “Application” menu, and select “Master,” then choose “Items.”
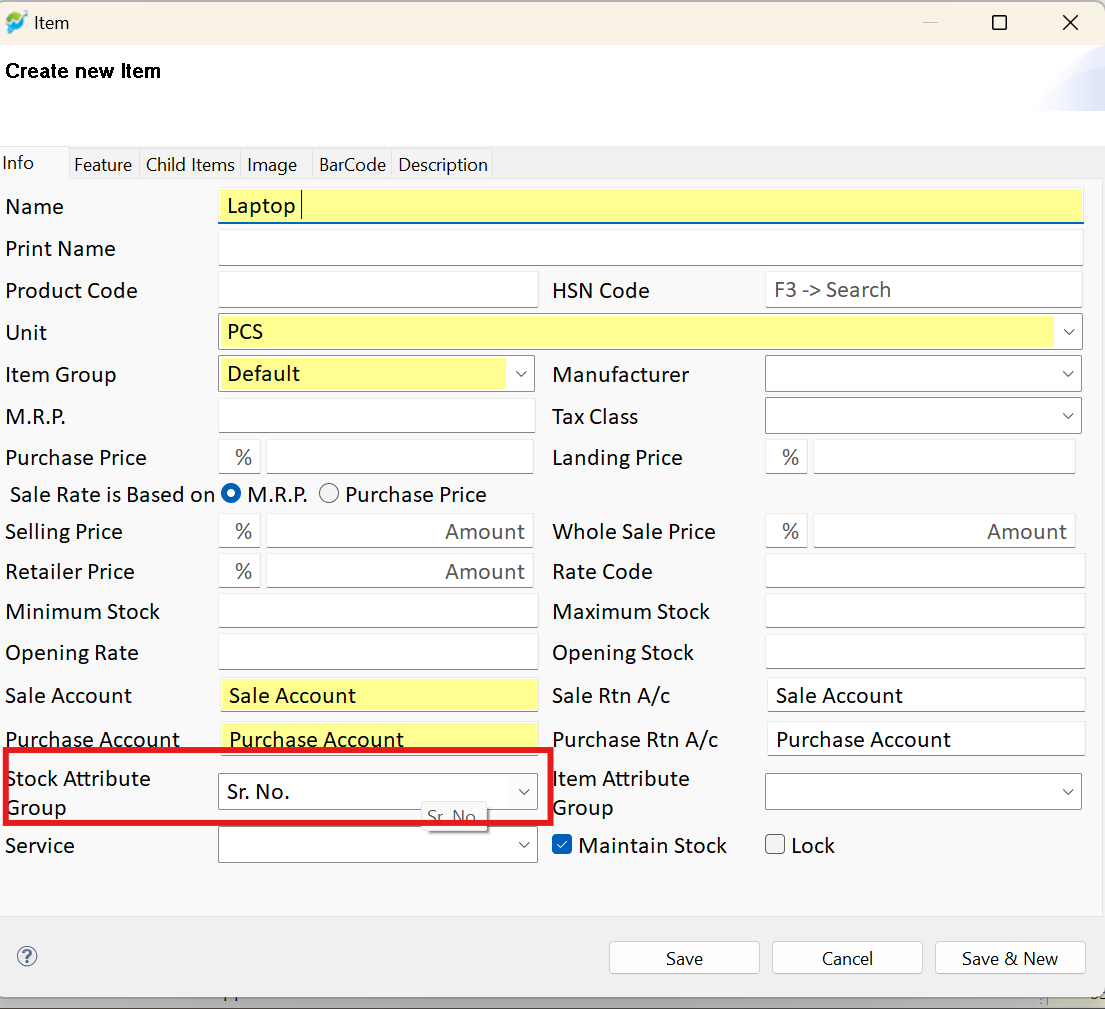
Step 2: Create an item with an attached serial number in the stock attribute.
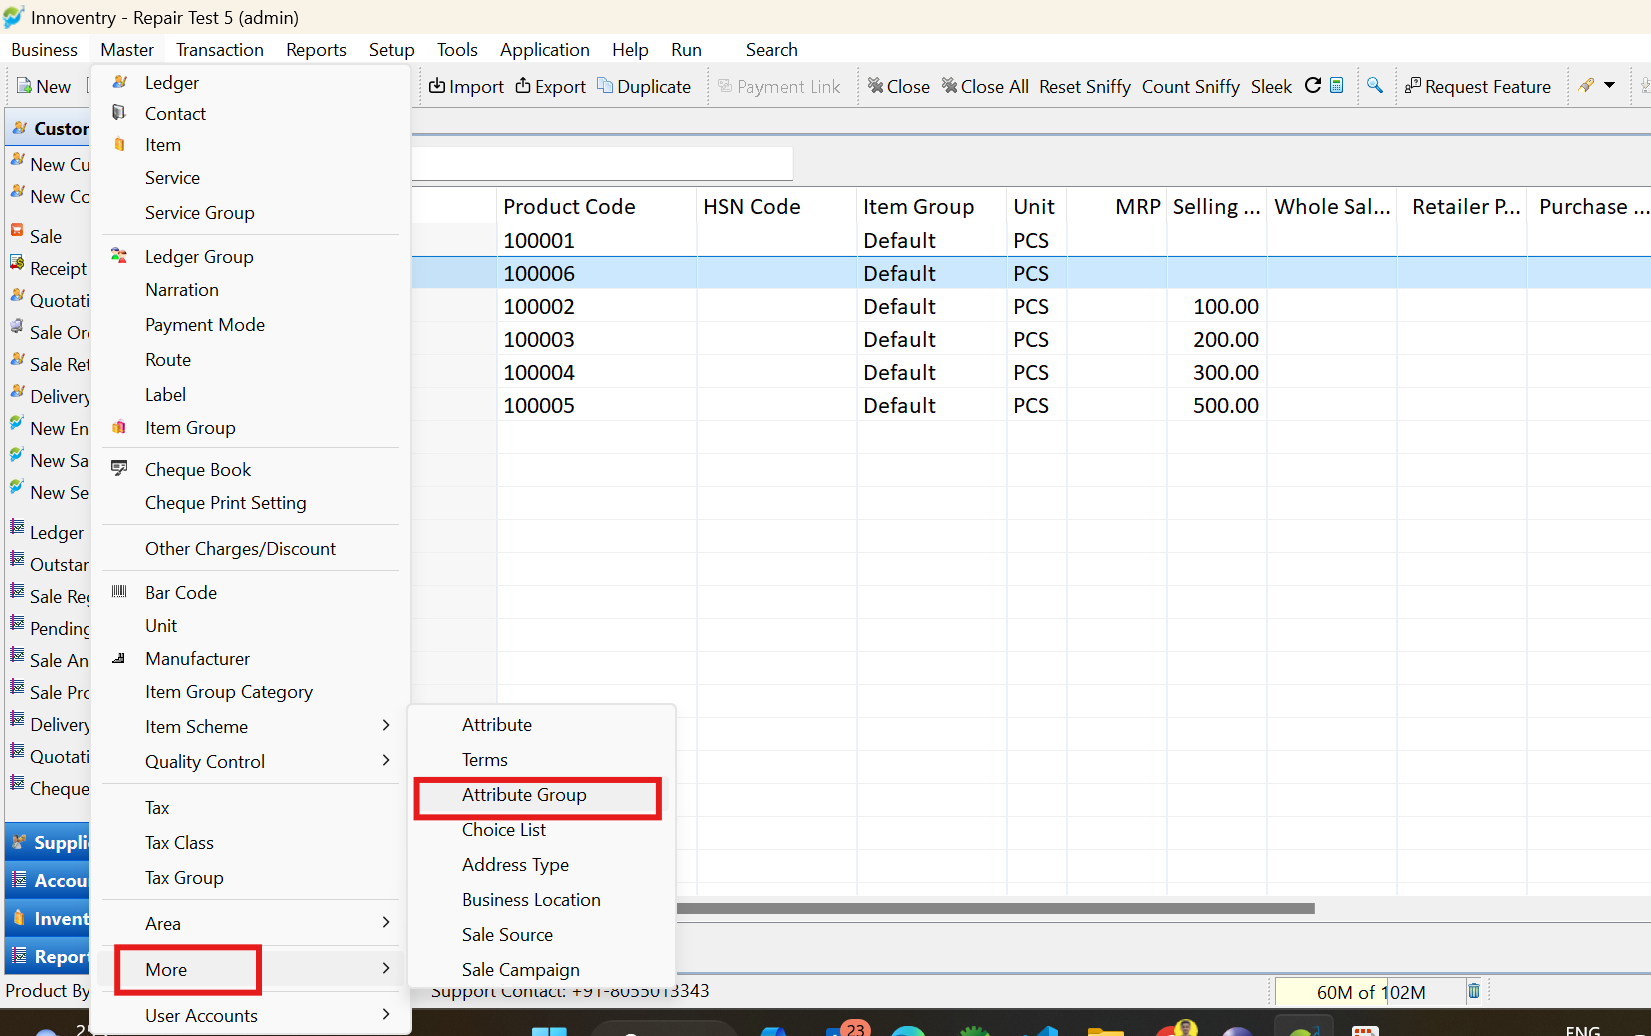
Step 3: Navigate to “Master,” then “More,” and select “Attribute Group.”
Step 4: Search for the “Sr No” attribute, edit it, and click on “New Attribute.”
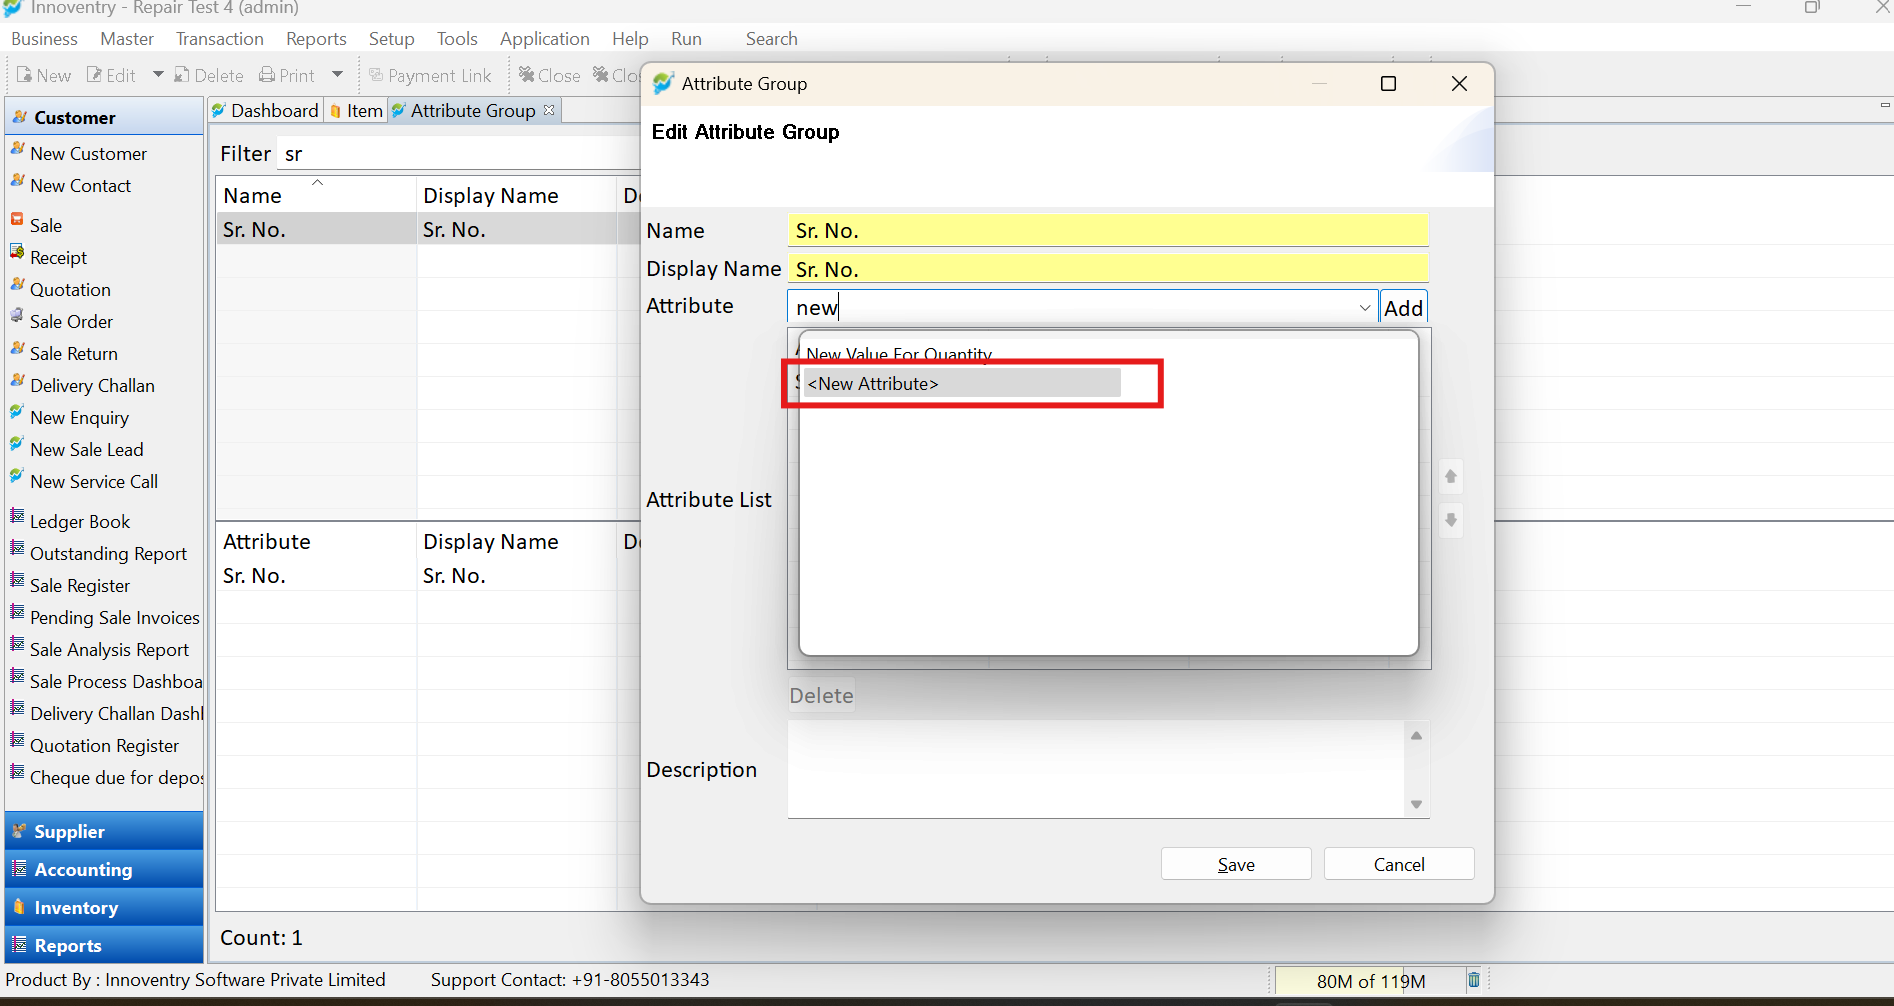
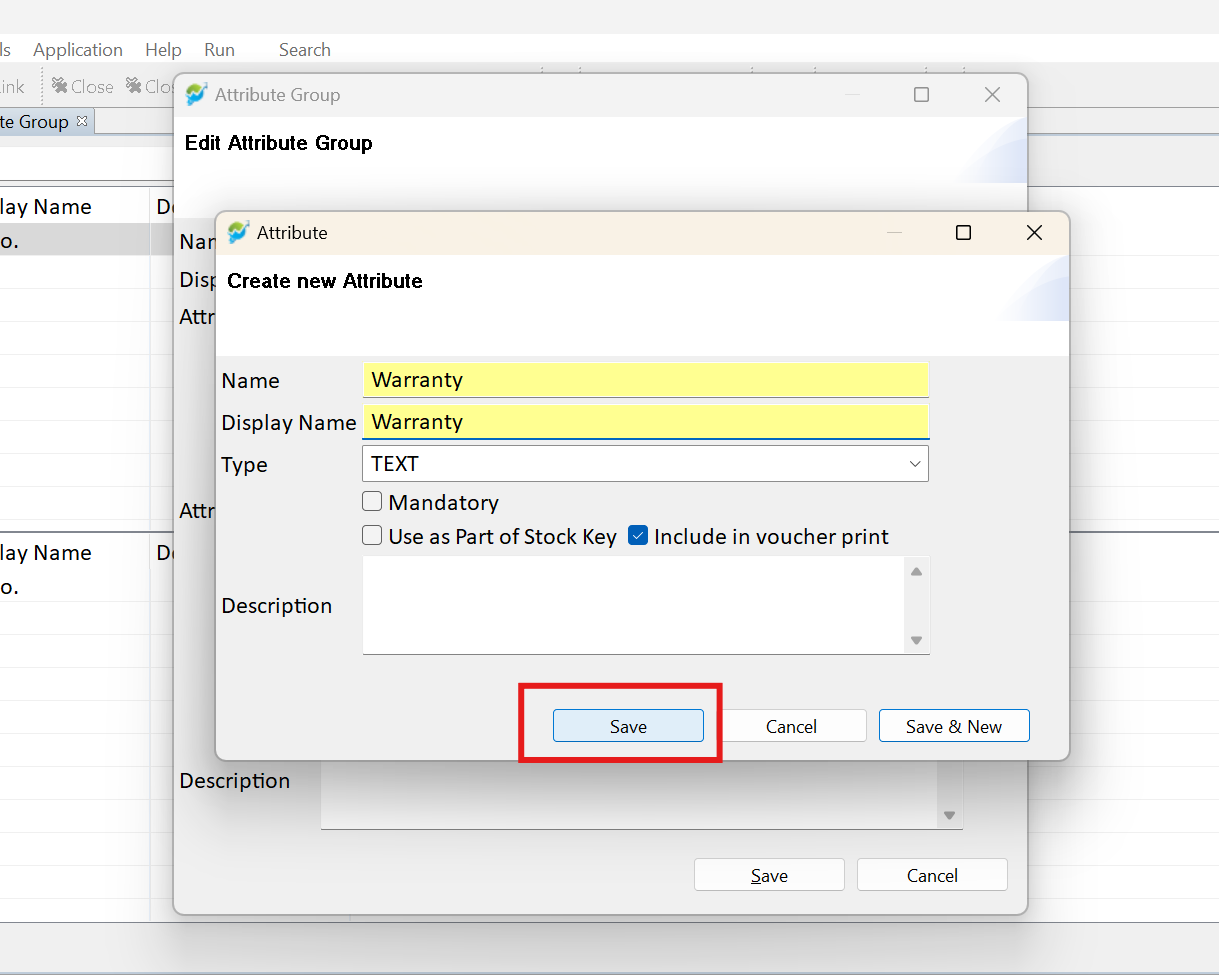
Step 5: Create an attribute named “Warranty” and save it.
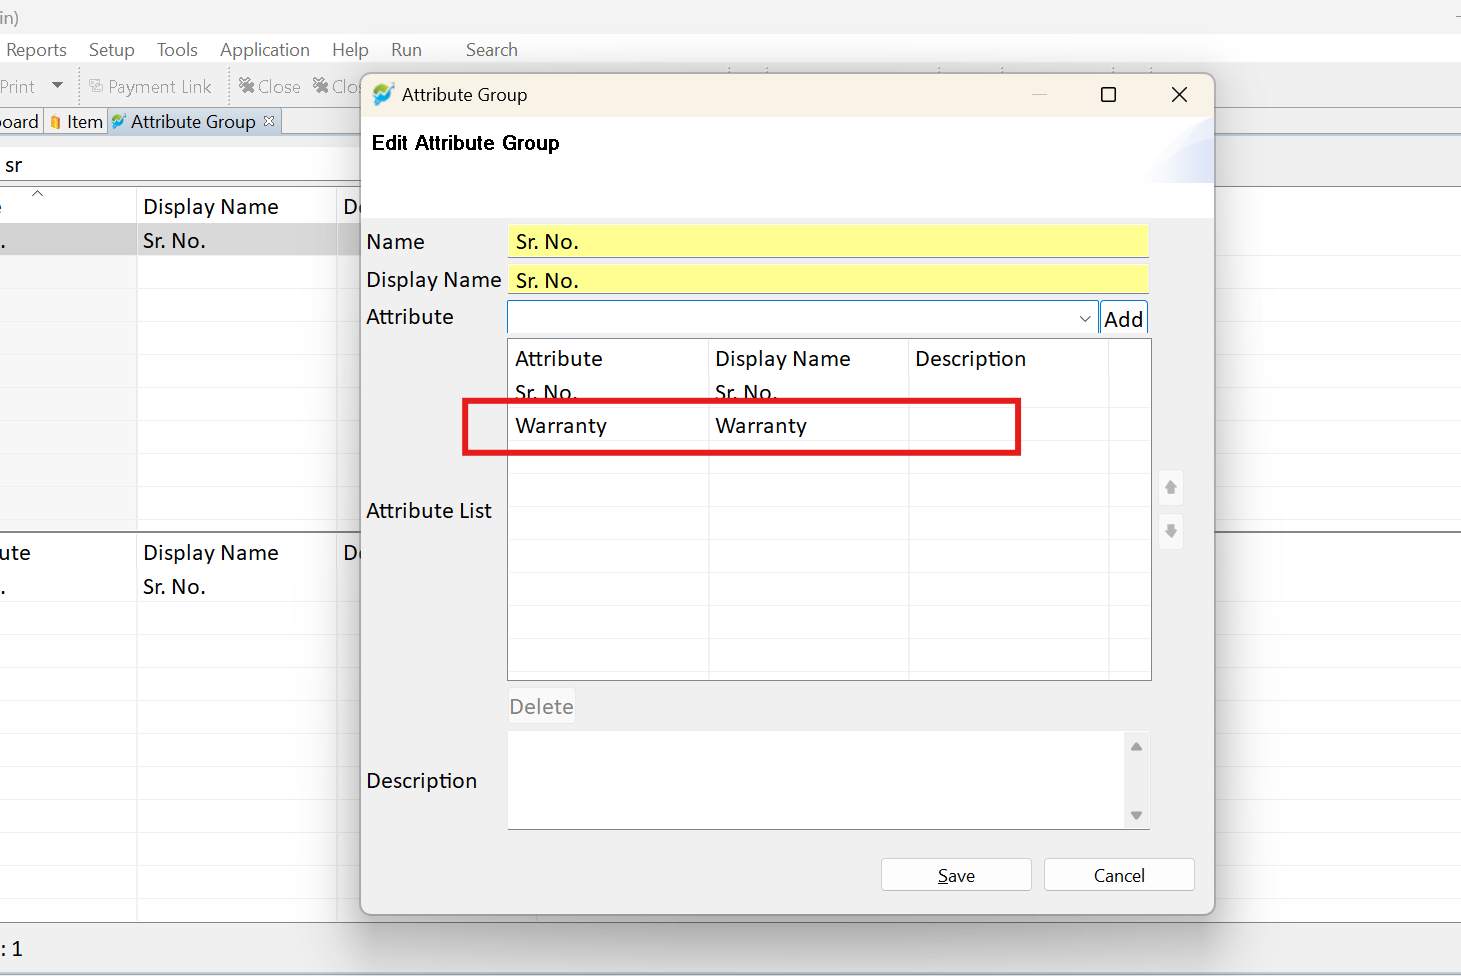
Step 6: Add the “Warranty” attribute to the item and save it.
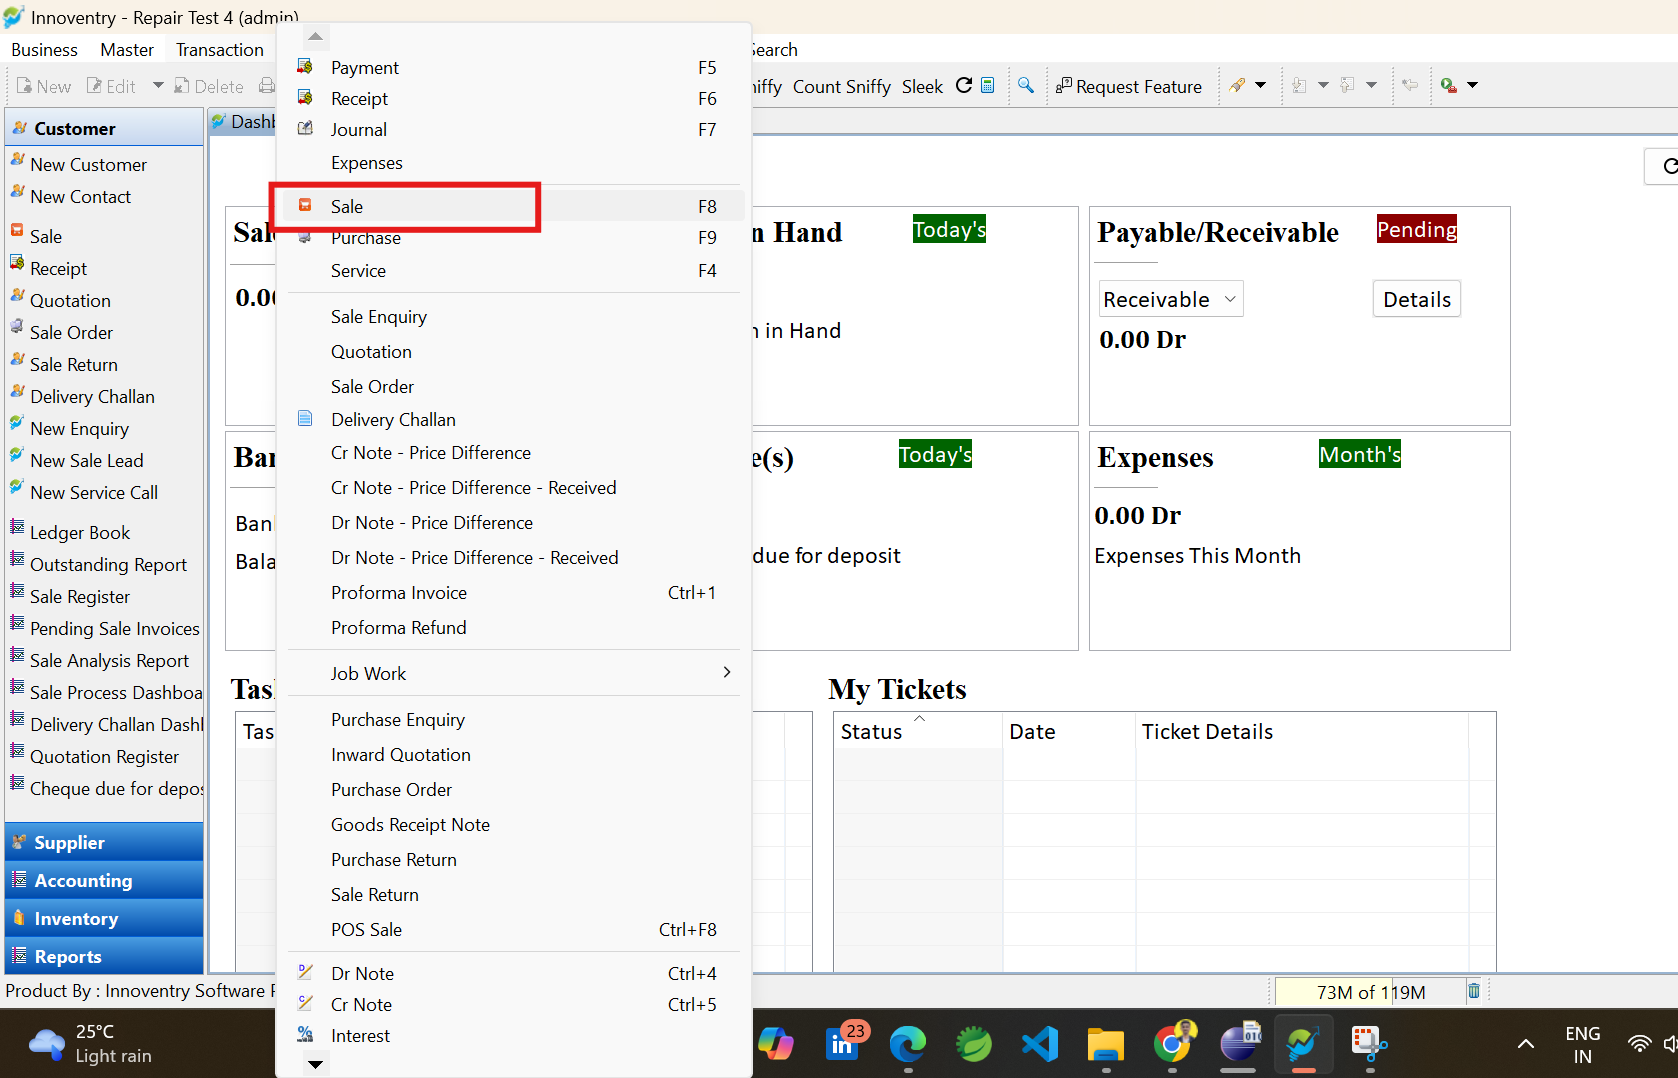
Step 7: Go to “Transaction,” then “Sale.”
Step 8: Create a purchase entry for that item, click “Add,” fill in the details, and save the transaction.
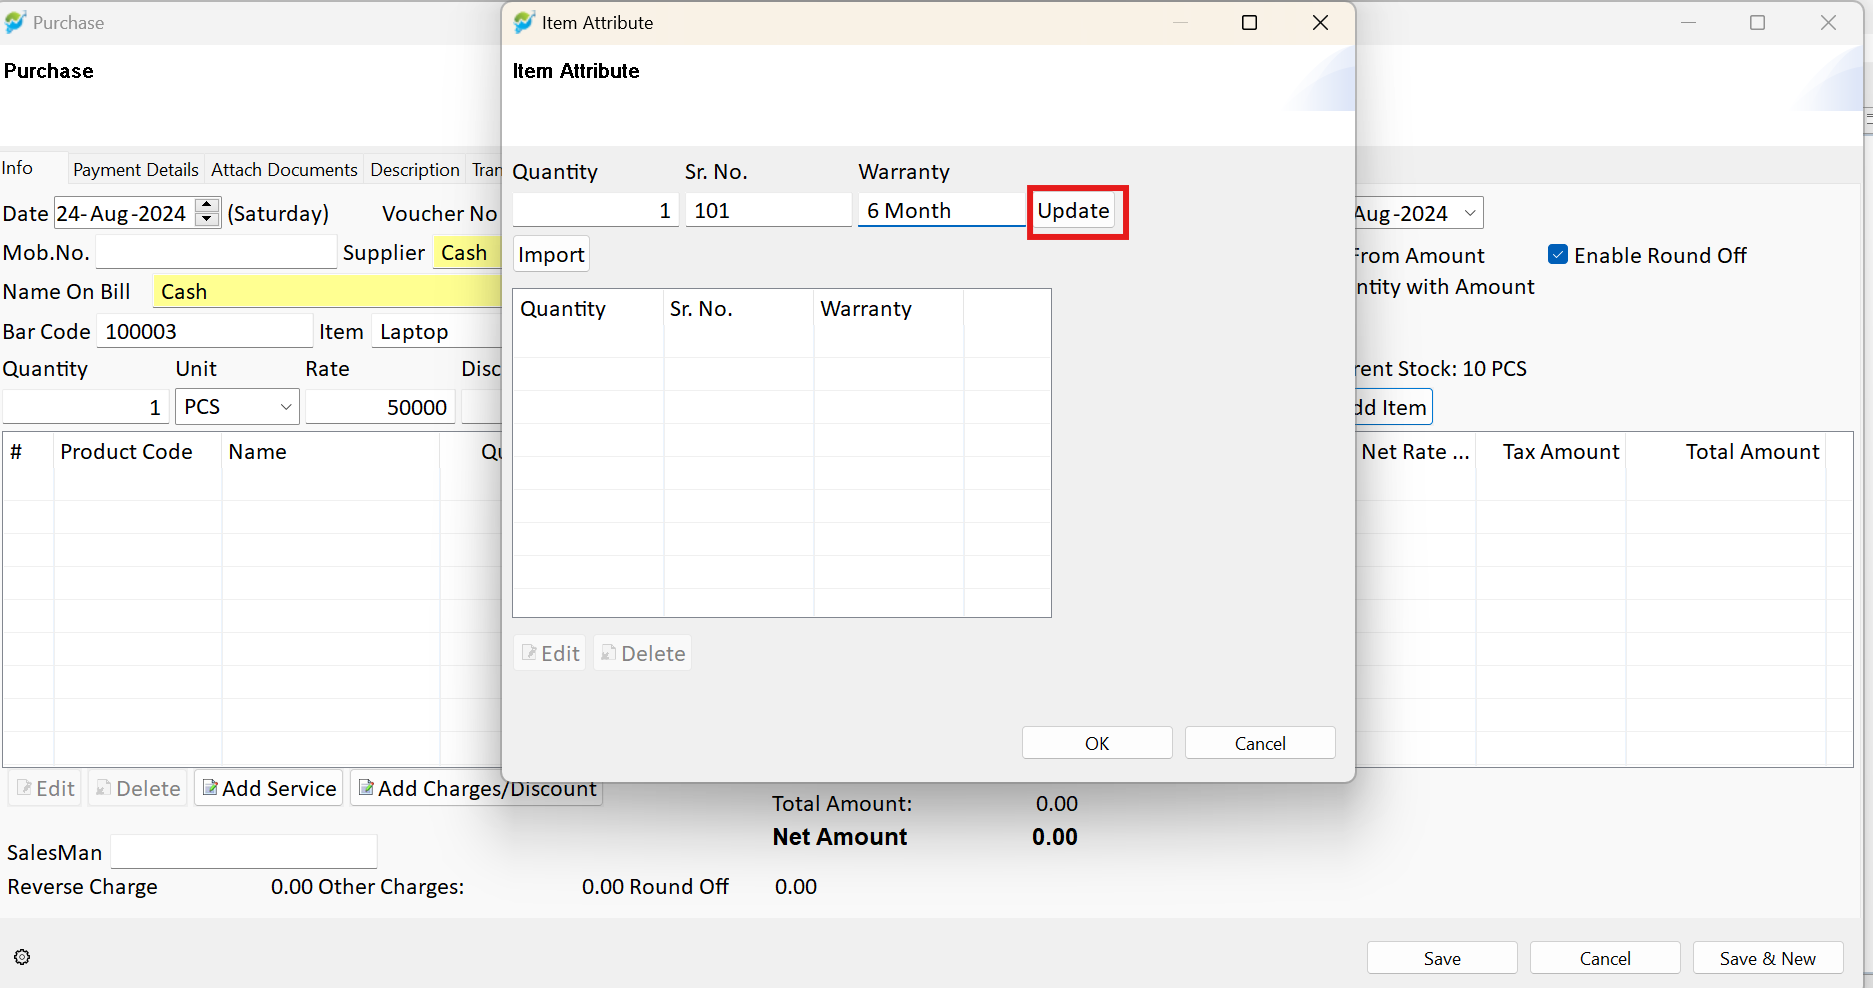
Step 9: Navigate to the “Sale Transaction.”
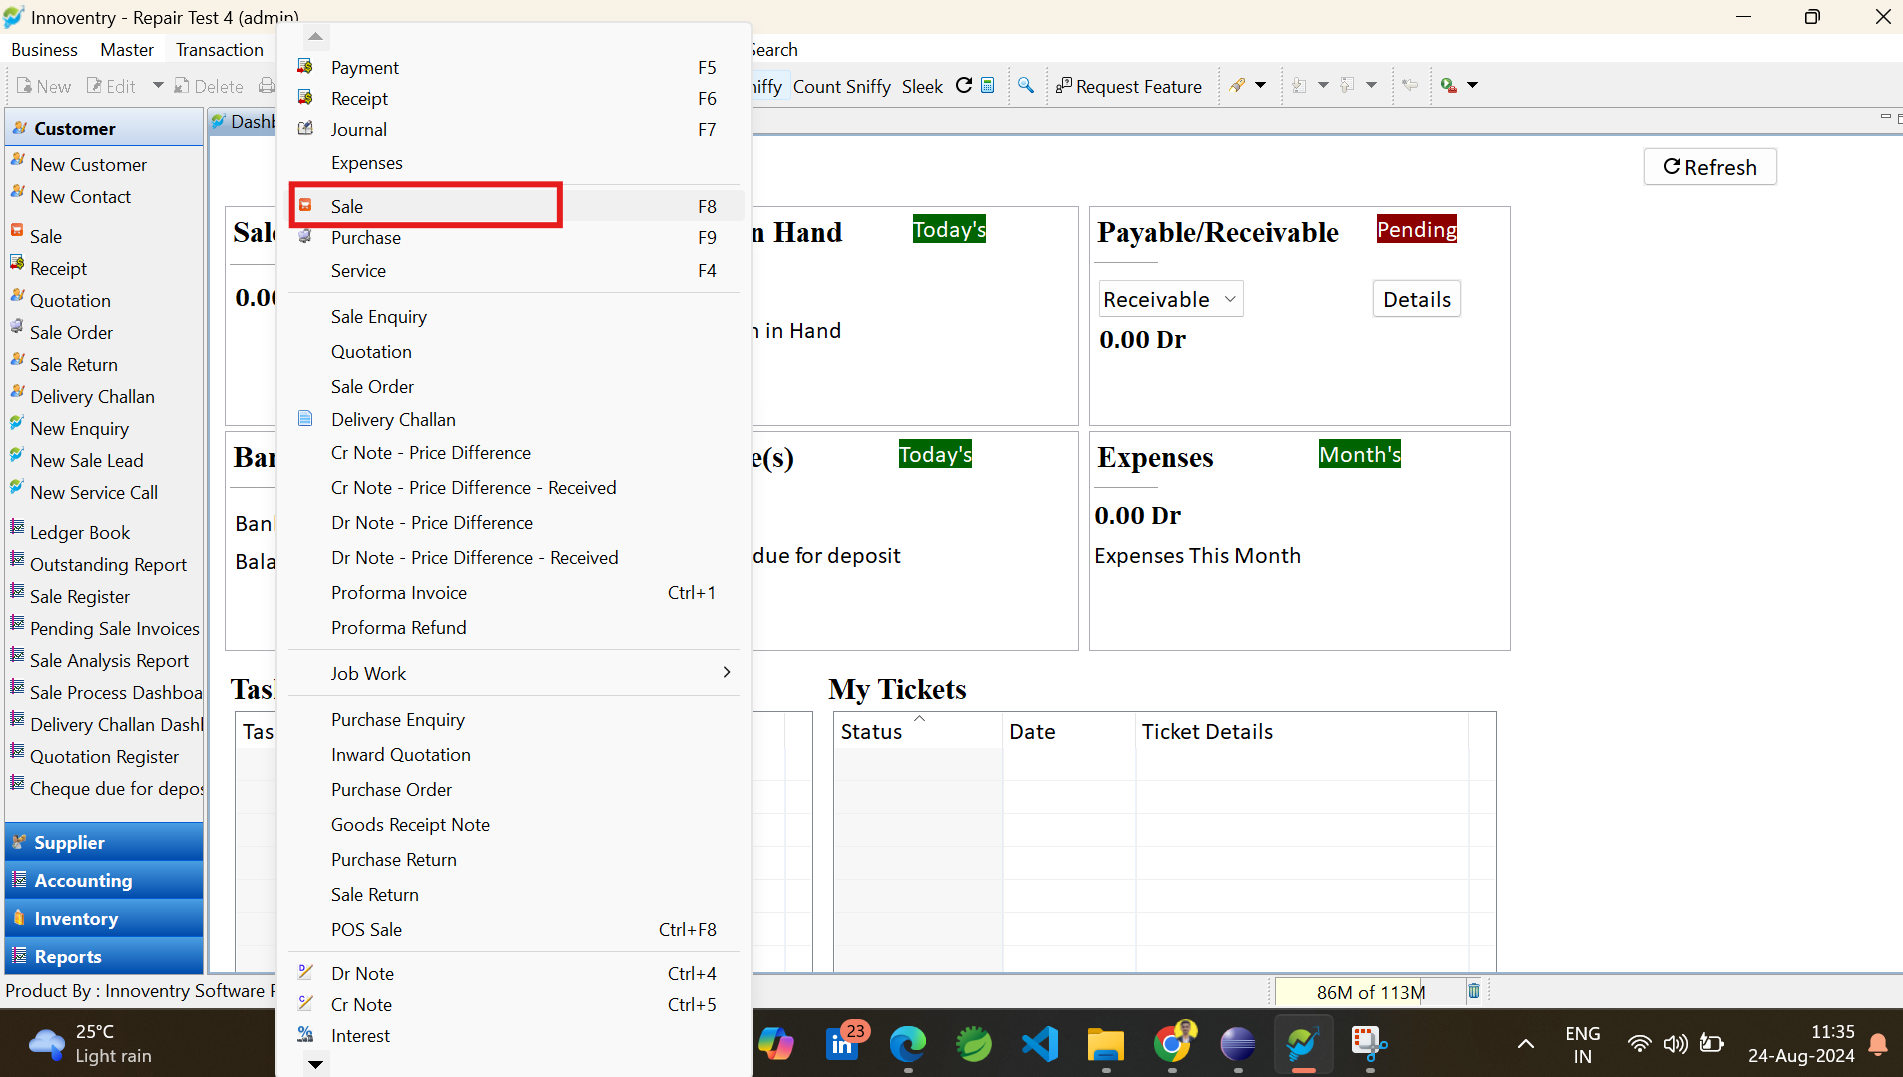
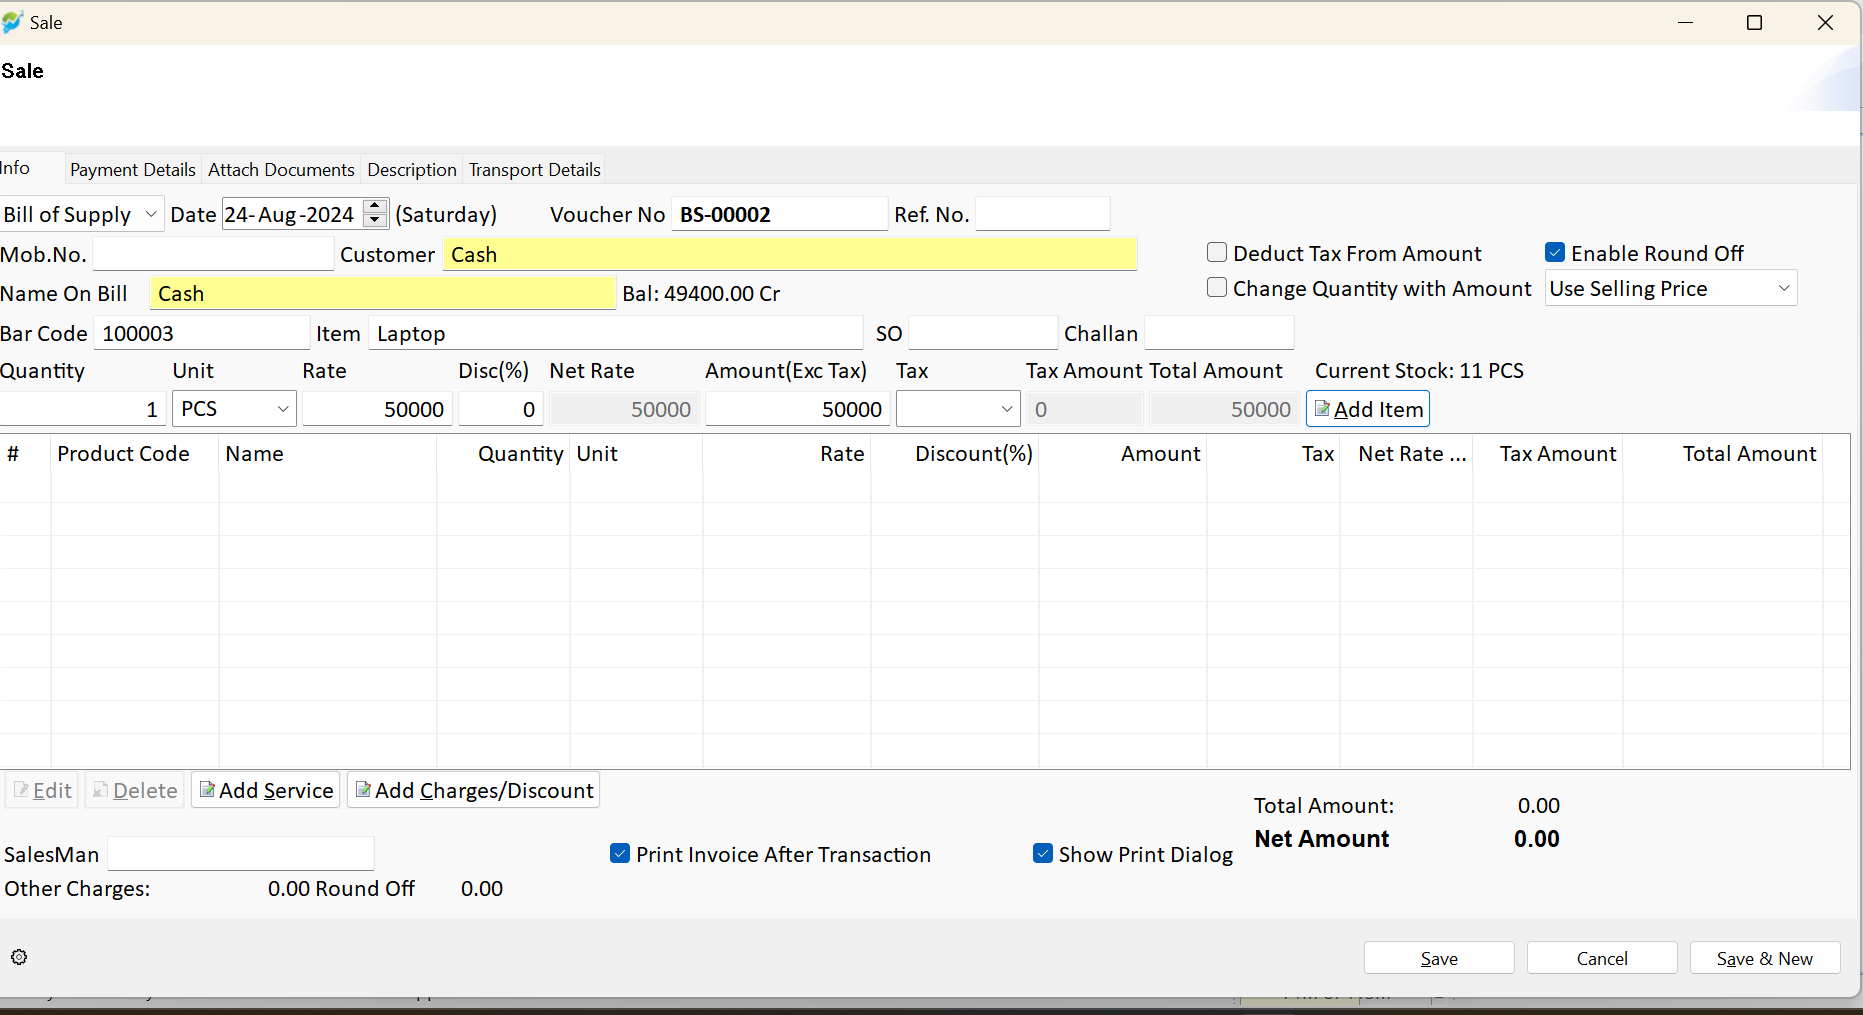
Step 10: Create a sale entry for that item.
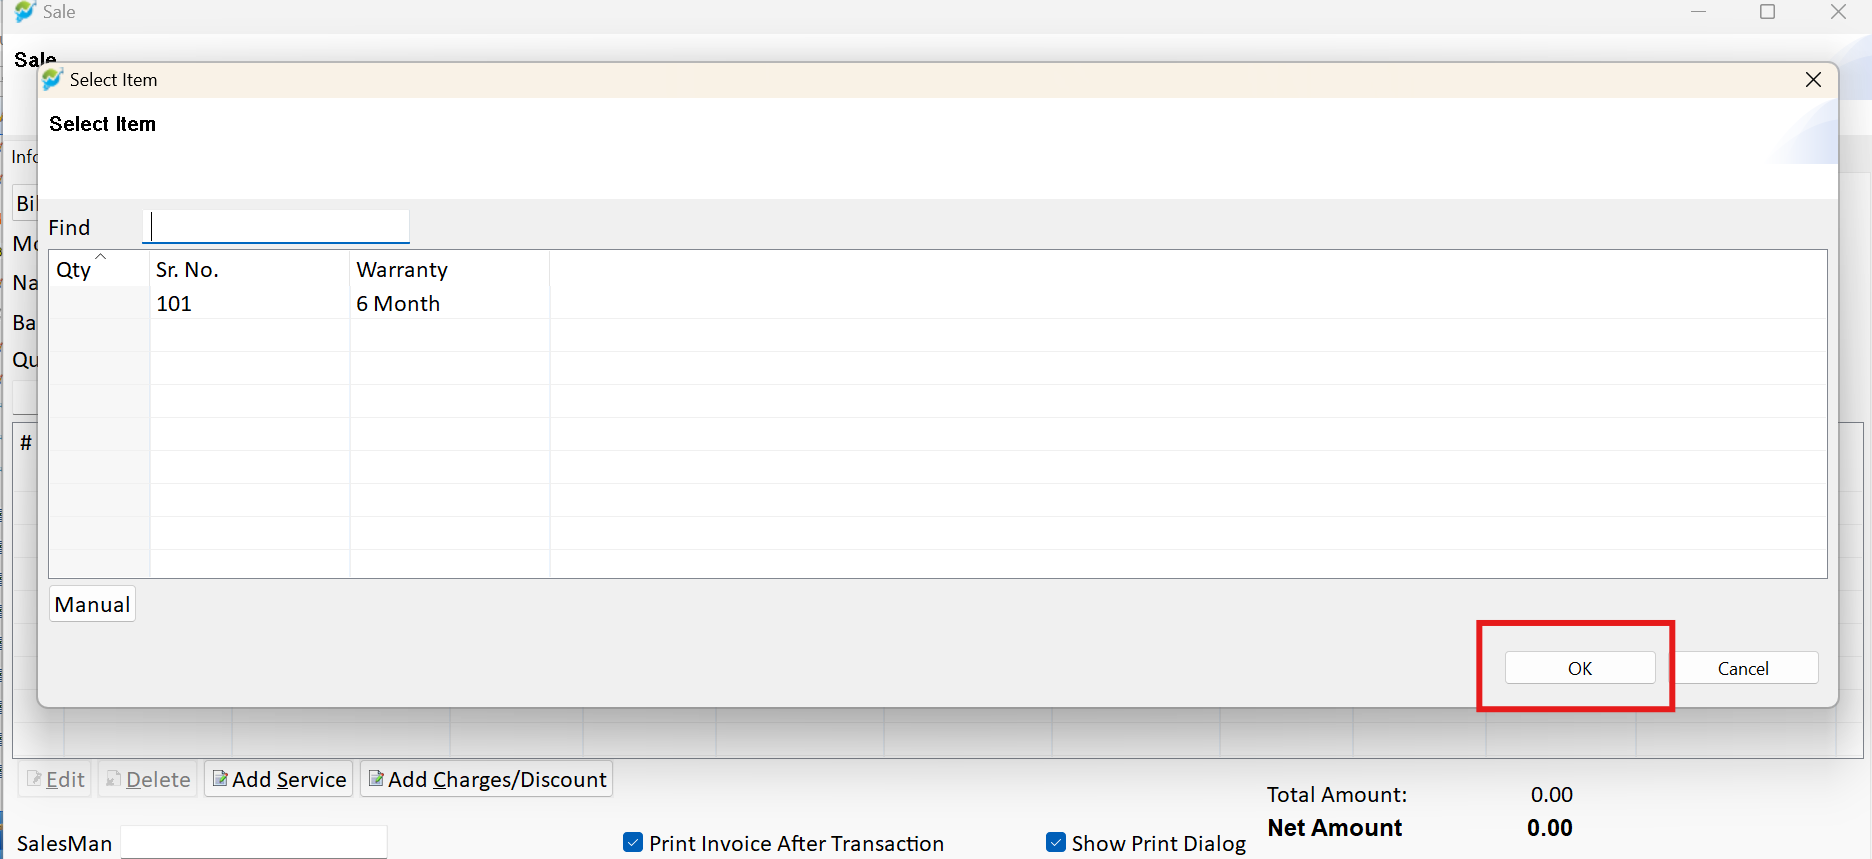
Step 11: After adding the sale transaction, check the warranty details and save the transaction.
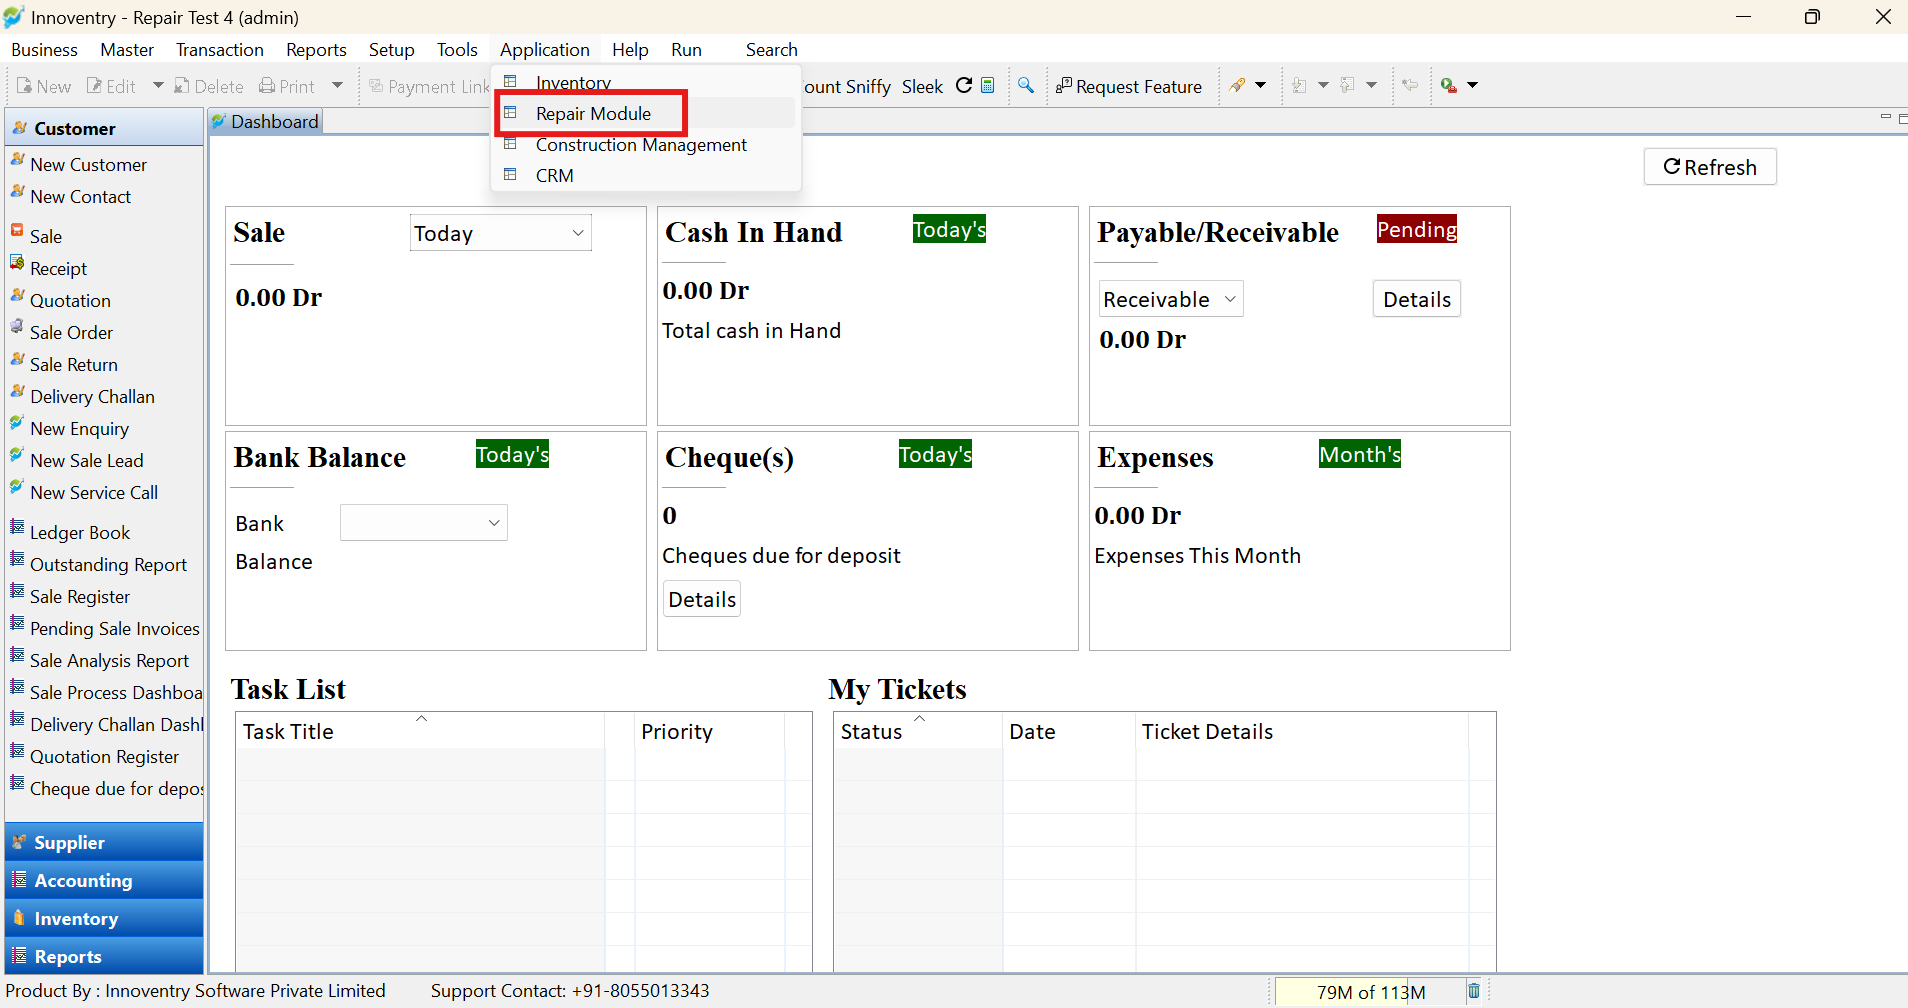
Step 12: Switch to the “Repair Module” in the “Application” menu.
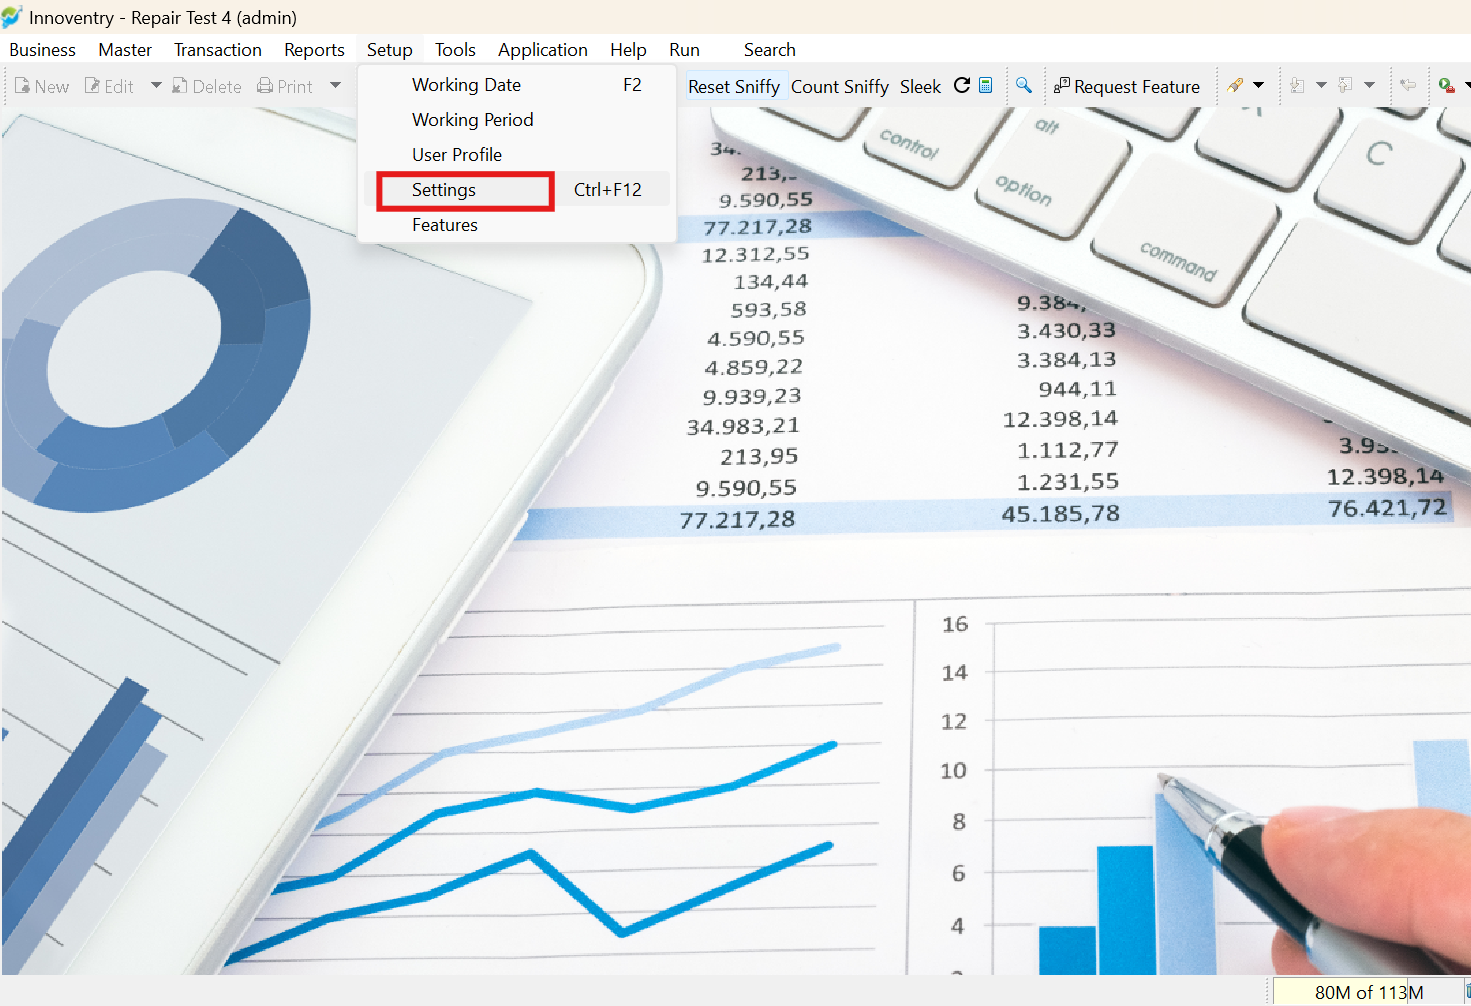
Step 13: Go to “Setup,” then “Settings.”
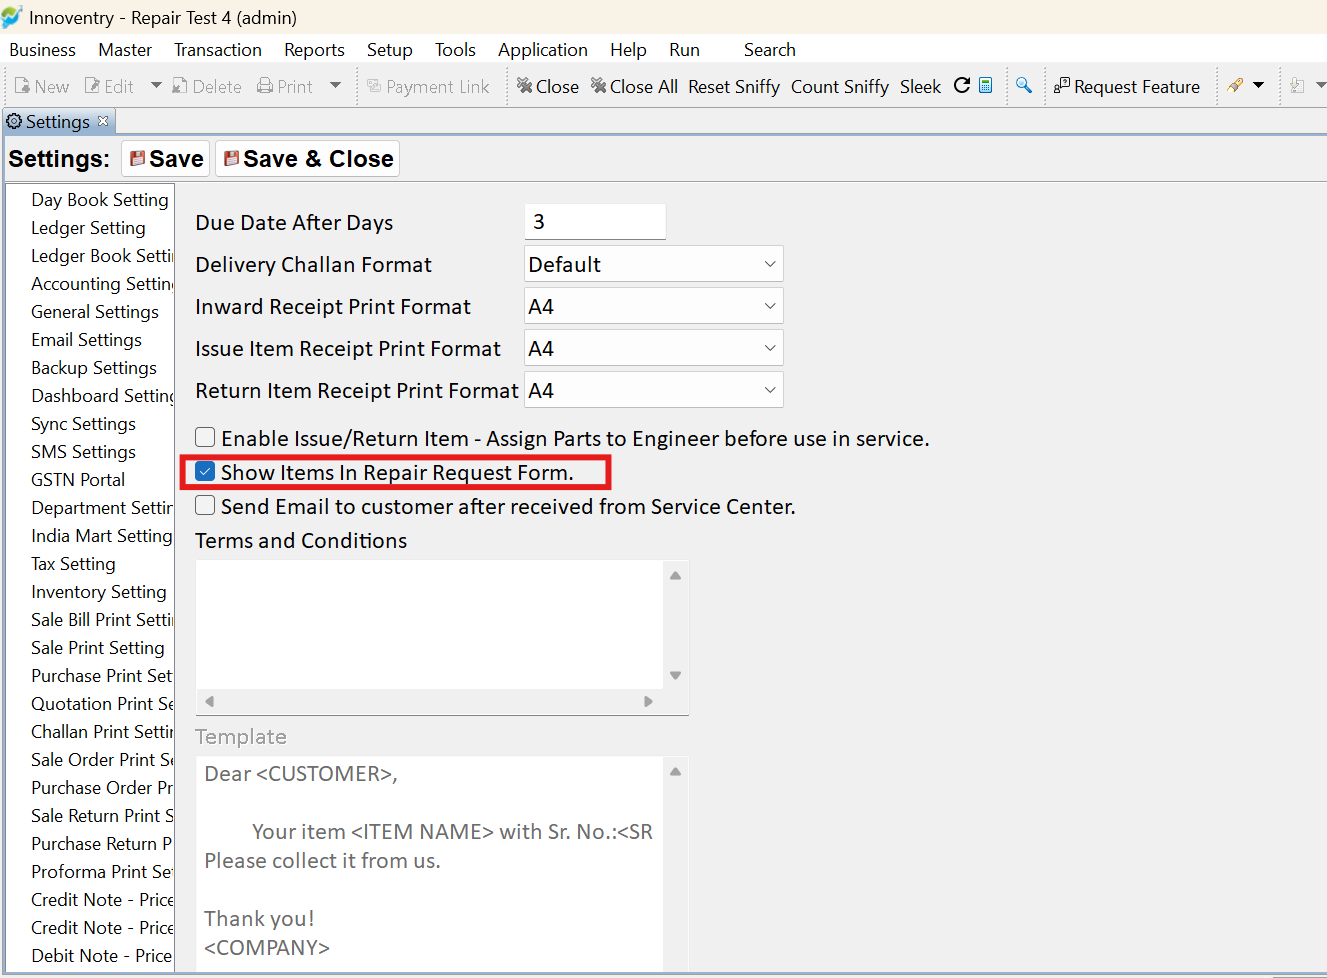
Step 14: Navigate to “Repair Settings,” enable the relevant checkbox, and click “Save and Close.”
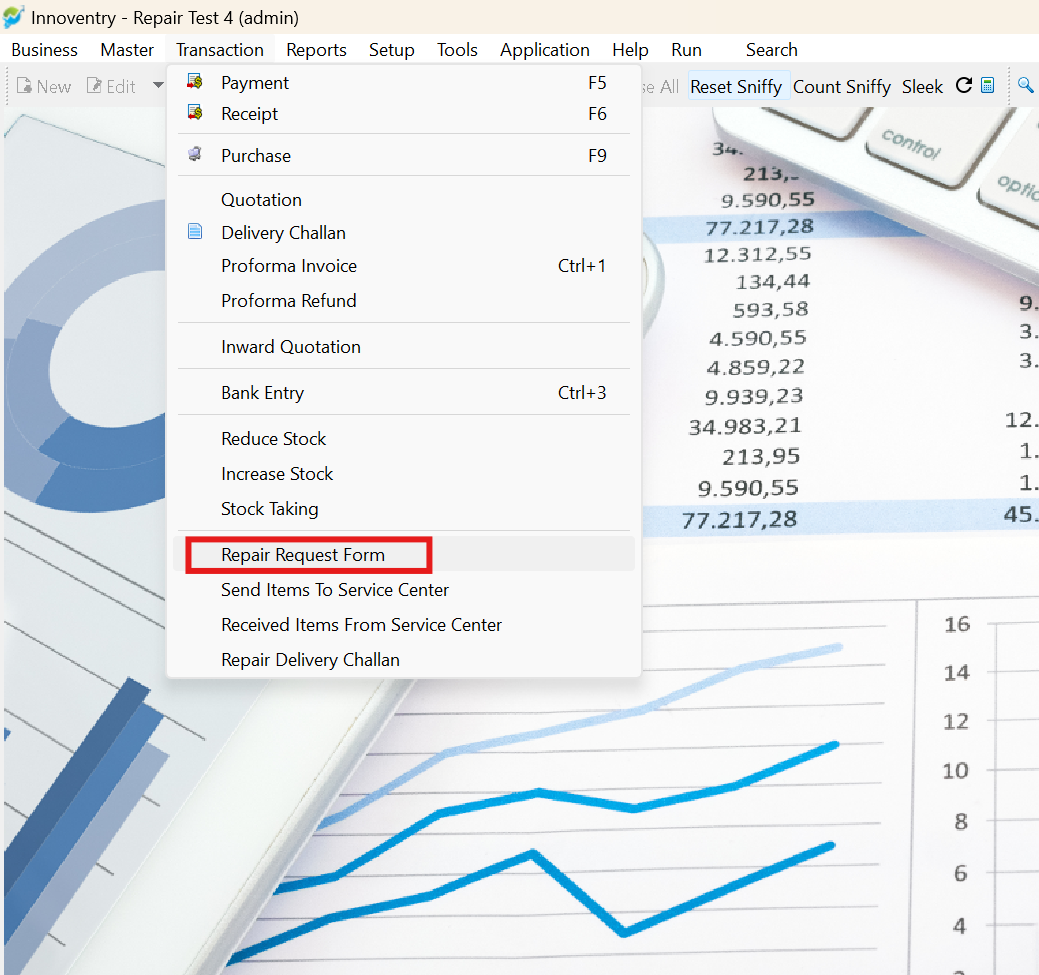
Step 15: Go to “Transaction” and select the “Repair Request Form.”
Step 16: Create a transaction for that item, enter the serial number used during the sale creation, and press “F5.”
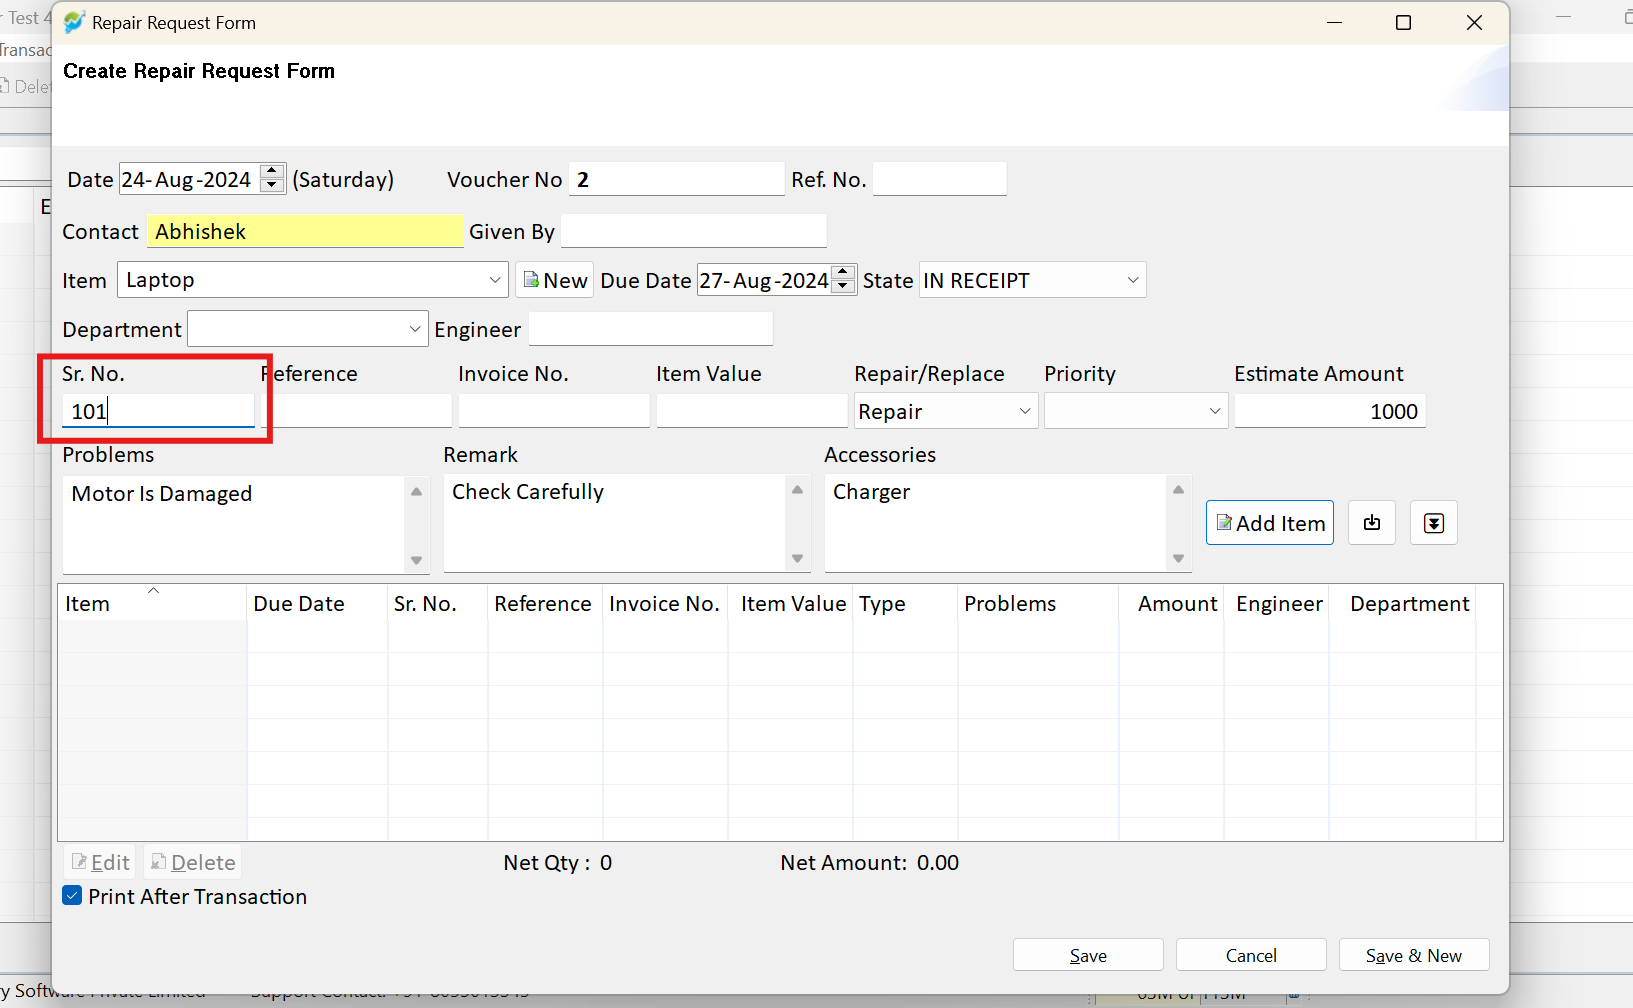
Step 17: A new window will appear. Select the entry and click on “Add Details.”
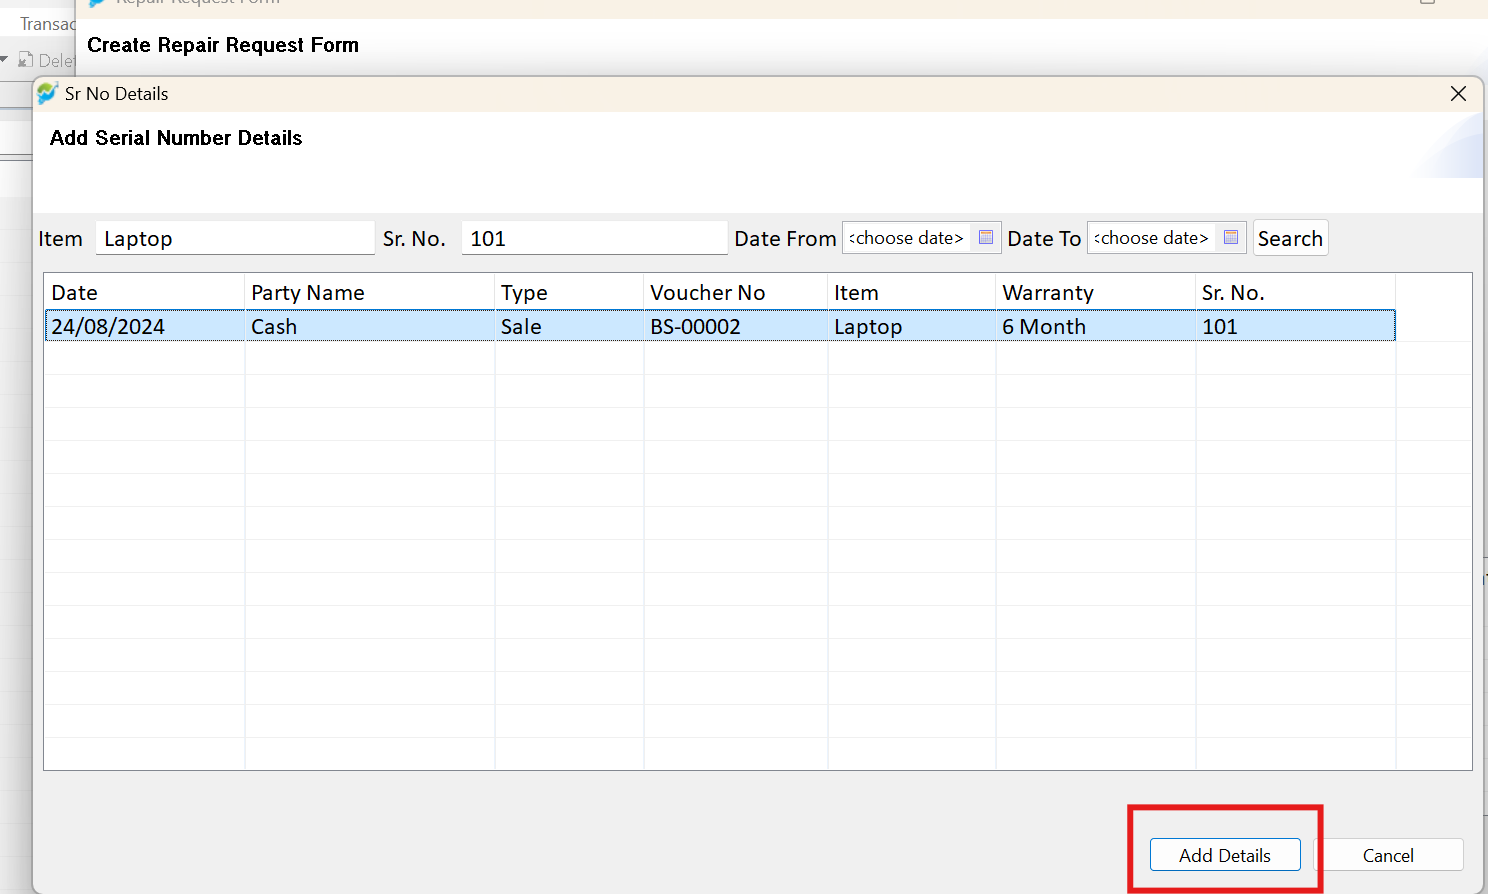
Step 18: The invoice number, warranty details, and item value will be automatically added. This allows you to seamlessly add warranty details in the Repair Request Form.